For: CRMDAY One users with the Insurance profile.
The client reads and fills through the link
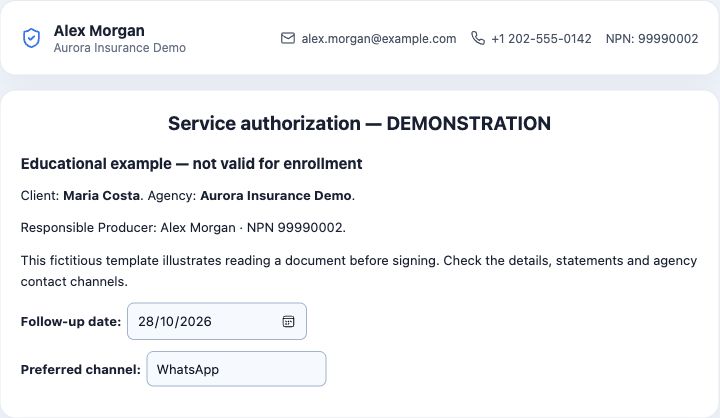
The client opens the received address and sees agent/agency identity and the prepared document. They should read, check suggested details and complete requested fields. Fields vary by template: some are short; others have applicant, income, family and address steps.
- Ask the client to use their own interaction’s link.
- Have them check title, agent name and presented details before filling.
- Required fields must be completed. In step-based forms, the client advances and reviews answers before signing.
- If details are wrong or a statement is unclear, they should contact the agent before confirming. The agent must not sign for the client.
Receive files in templates with a document step
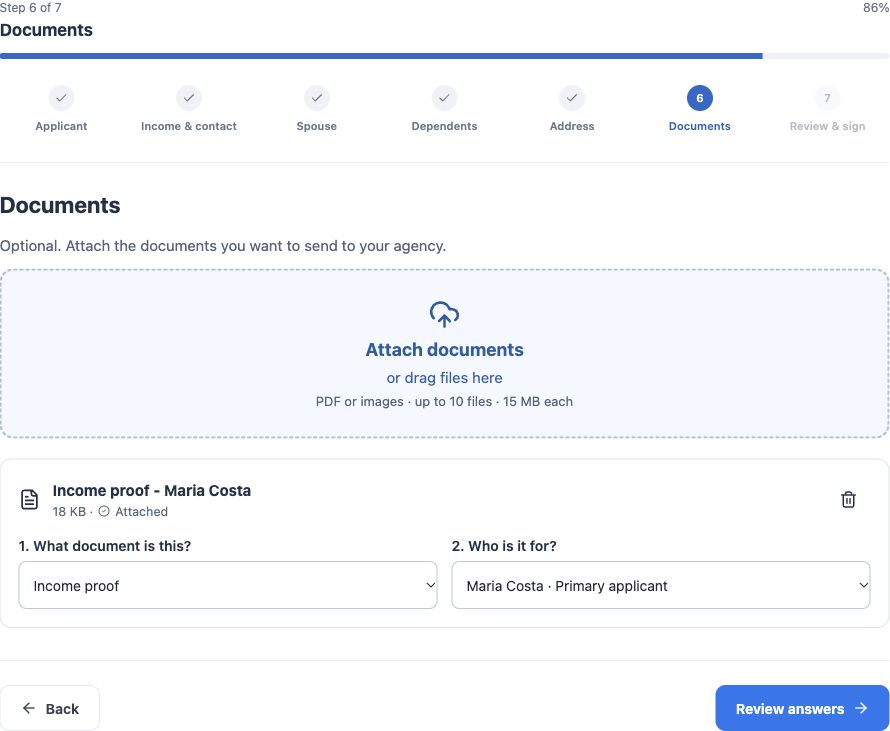
- In Open Enrollment, the client reaches Documents and uses Attach documents or drags files into the indicated area.
- For each file, they choose the document type and person. The example shows fictitious income proof linked to Maria Costa.
- Check displayed formats and limits: here, PDF or images, up to 10 files at 15 MB each.
- The client reviews files and people before choosing Review answers. Upload or classification errors must be resolved; selecting a file alone does not guarantee receipt.
- ACA - Application Form also collects files, with its own layout. Do not assume every customized form allows uploads.
Received documents are linked to the request and contact attachments. A file attached, a document signed and a document accepted by the carrier are different events.
The client completes their own signature
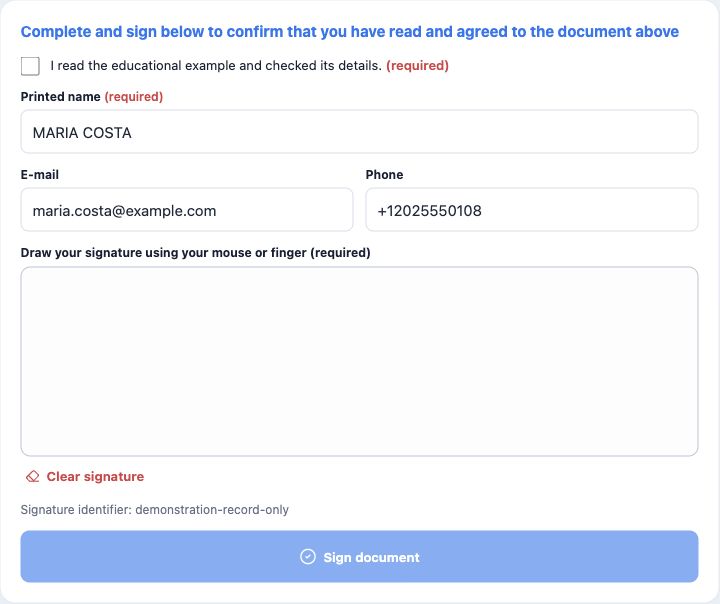
- After reading and reviewing, the client checks the template’s required statements.
- Checks full name, email and phone.
- Draws their own signature using mouse or finger. They can clear and redo it before completion.
- Uses the final Sign document action and waits for confirmation. If unavailable, checks fields, statements, signature and pending documents.
- The agent refreshes the record and checks Signed. Completing details or uploading files without finishing signing does not produce this state.
The image below shows the stage before confirmation, without an applied signature. Signed states elsewhere are synthetic demonstration data; no real person was represented in a signature.
Open and check the received PDF
- Find the correct Signed request in the contact. Check template, title, date and signer.
- Use View signed form to open the viewer and inspect content and answers.
- If the embedded PDF does not display, use Open in new tab or Download. The request row also offers the signed-PDF download action.
- Check names, dates, listed files and signature result in the document, not merely its filename.
- For Open Enrollment, remember the canonical PDF is saved in English even if filling happened in another language. Preserve the received original.

Check where files were stored
Under contact Attachments, check documents and the recorded PDF. Open or download the correct file and inspect it. Do not assume a contact attachment is already attached to the policy; each record has its context.
For an incorrect client file, preserve traceability and follow the agency’s correction process. If signed answers must change, use the appropriate correction or new-document procedure without rewriting the previous PDF. Continue with Organize outstanding items and next actions.

Keep learning
- Choose the right form or document
- Prepare the request and generate its link
- Send by message or email
- Track requests and resolve link issues
- Organize outstanding items and next actions
- Create the policy with the wizard
- Save and share the ACA simulation
Updated October 24, 2026.