For Insurance agency Owners and administrators.
How to use this visual guide
Start from New inbox → WhatsApp Meta API → Connect with Meta, as covered in the previous guide. The expandable images below are examples published in Meta’s official documentation, checked on October 25, 2026. They retain the source’s original English. Businesses and apps shown are Meta examples, not your agency or a connection performed for this manual.
Screen order can vary by version, account, number and coexistence. Follow your own window’s fields. The current documented flow requests the phone before business assets; some accounts may still show a different order. Expand each image to recognize the step and inspect its fields.
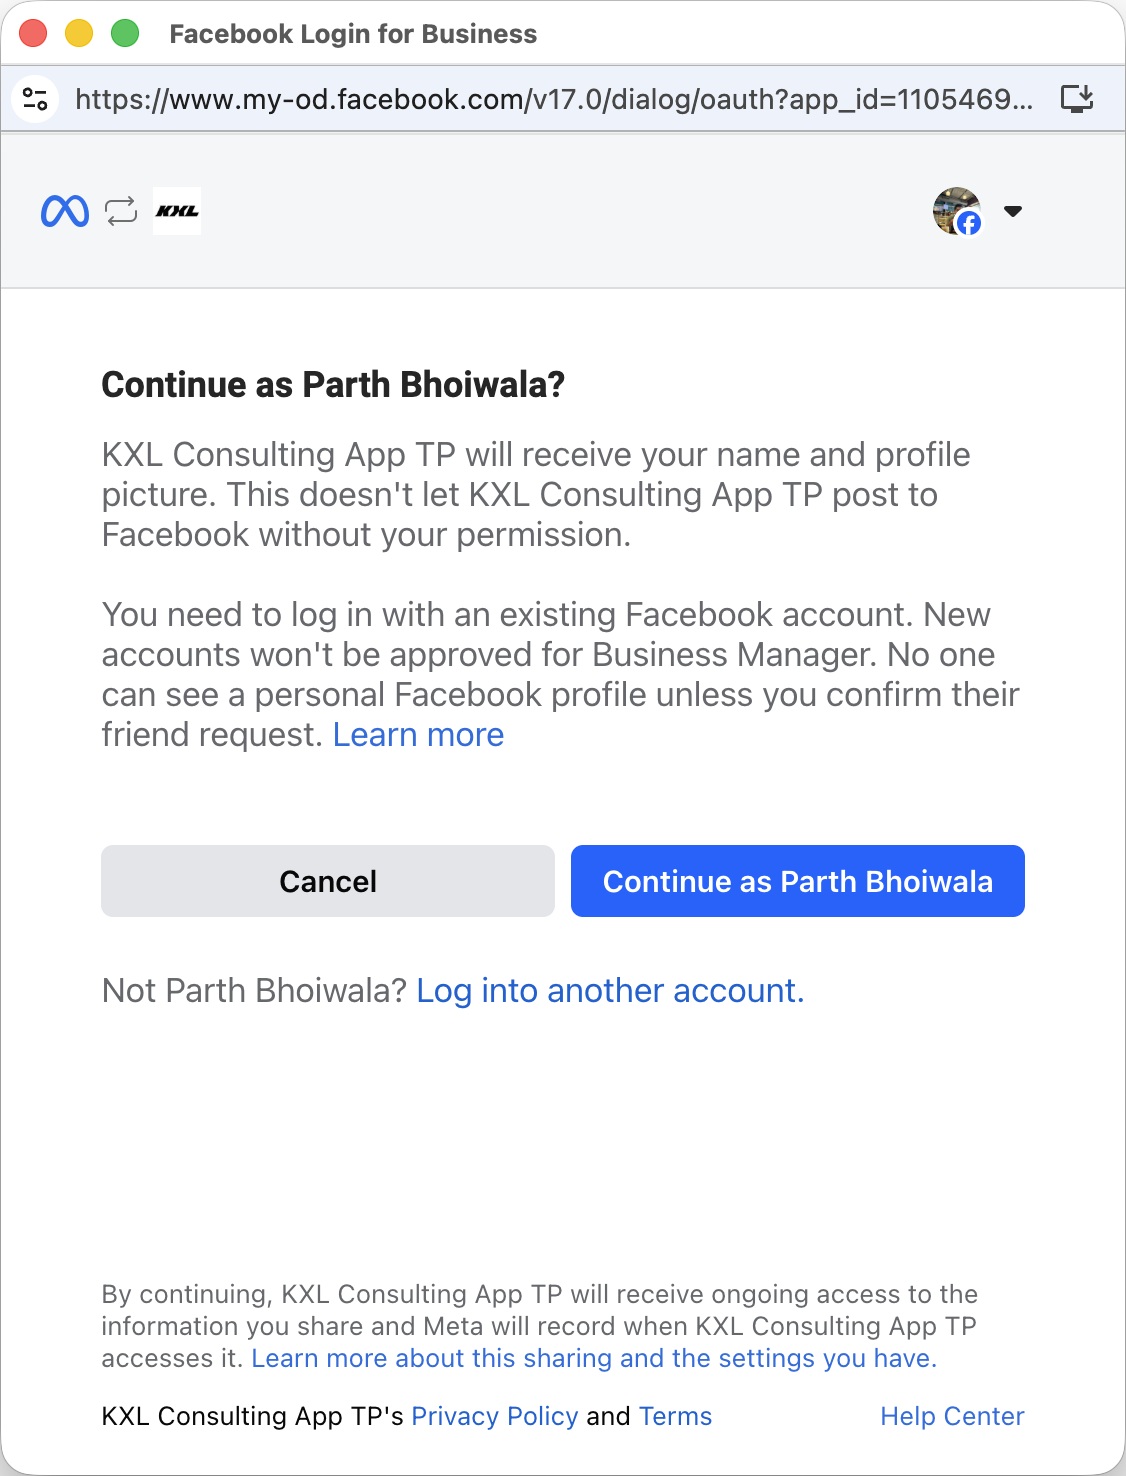
1. Check your Meta identity
At authentication, verify that the signed-in person has access to the correct business. Switch accounts first if needed. Complete login and security verification directly in Meta; do not enter those details into a CRM form.
View official Meta screen: Authentication
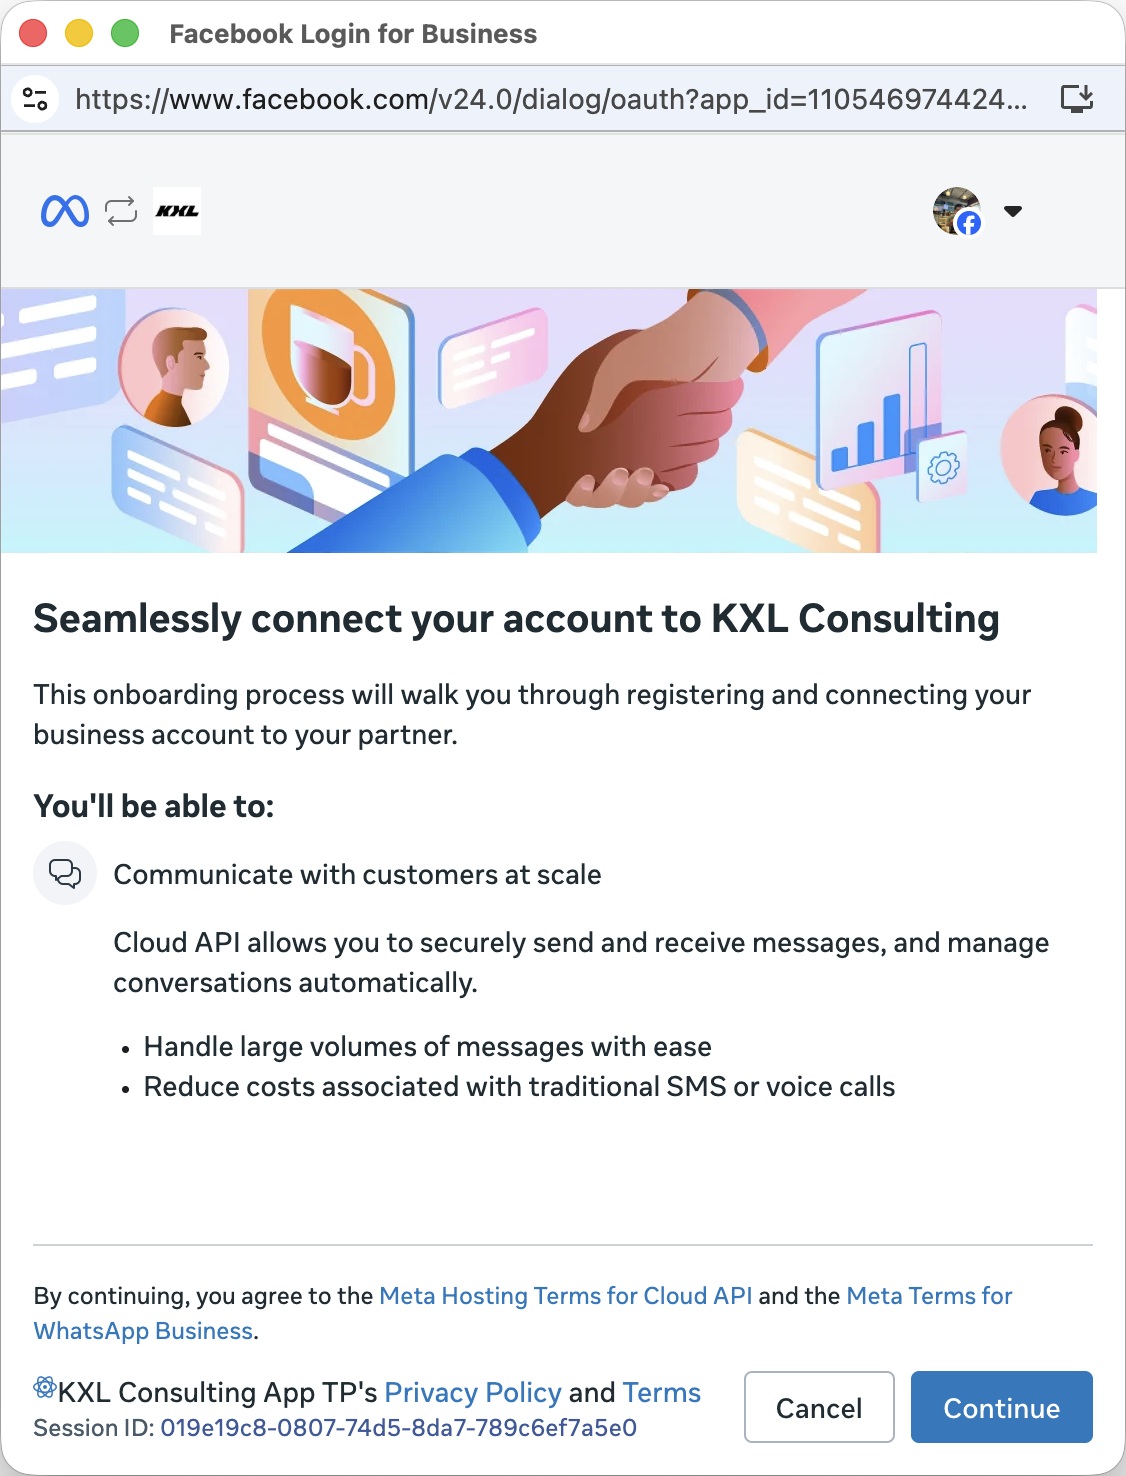
2. Review the application authorization
Check which application is requesting connection and what it can access. In the real CRMDAY-started flow, recognize the CRMDAY integration before proceeding. This screen describes capabilities; it does not mean the inbox is ready. Authorize only if responsible for those assets.
View official Meta screen: Authorization
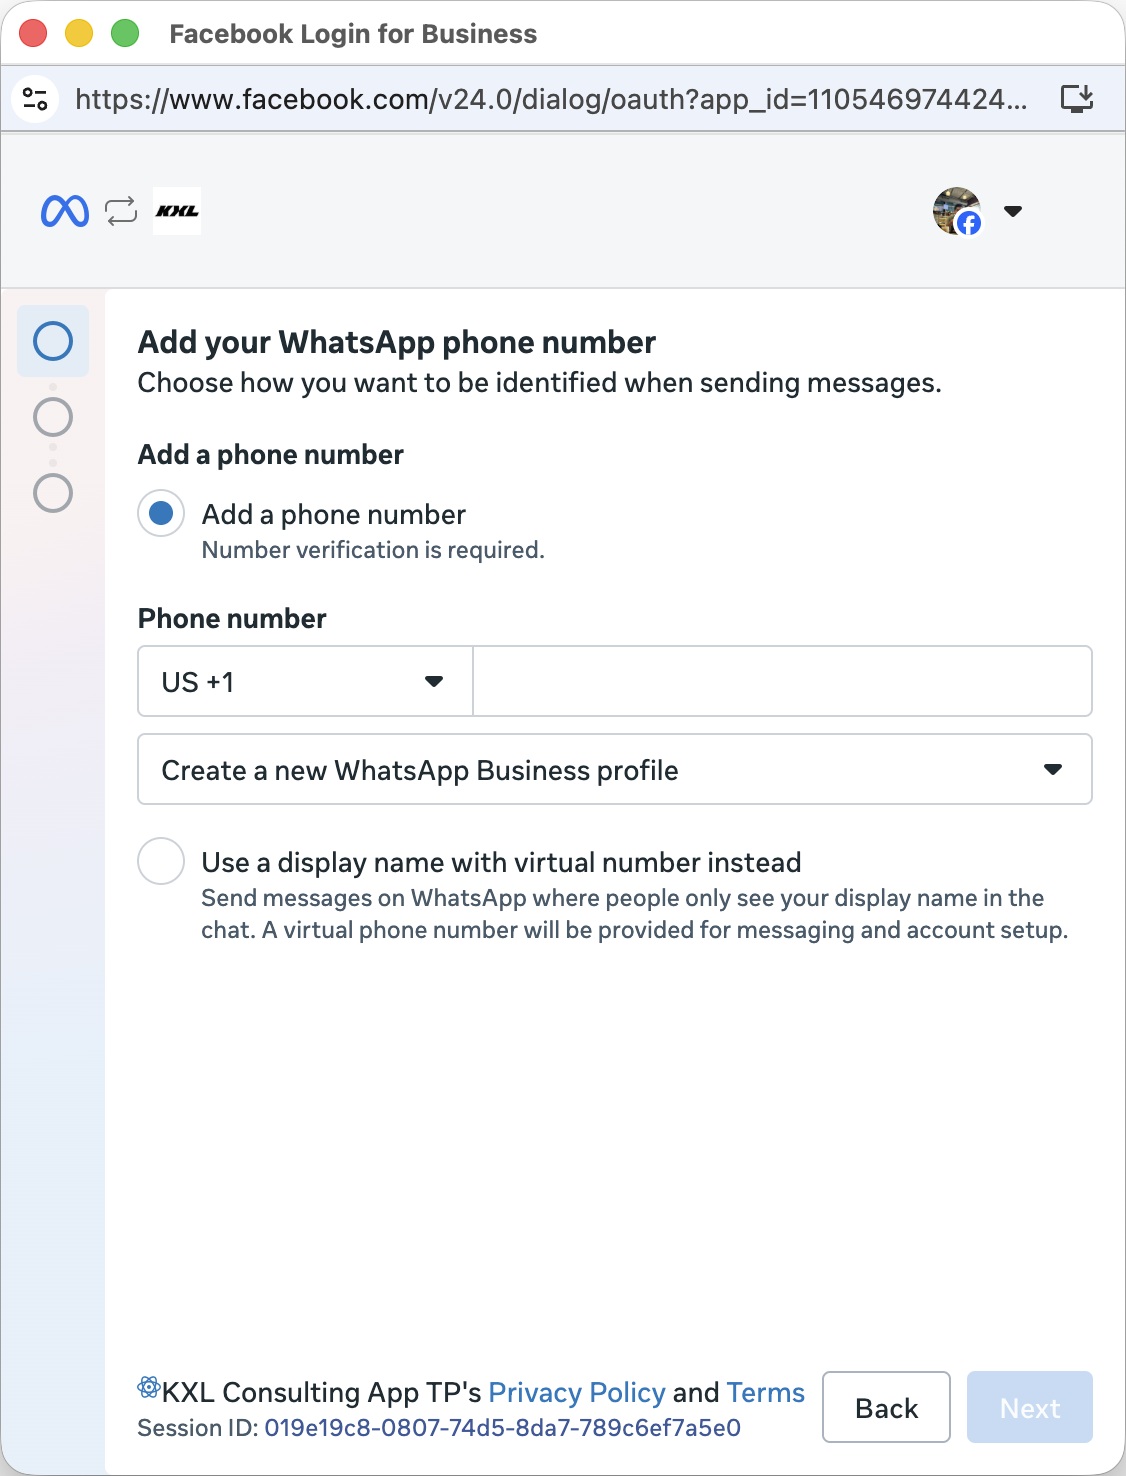
3. Enter or select the agency number
Check the country and phone, or select an existing number offered by Meta. Use an agency-controlled line. When changing authentication on an existing inbox, select that inbox’s same number. Do not finish with a test number, wrong personal line or another agency’s number.
View official Meta screen: Phone number
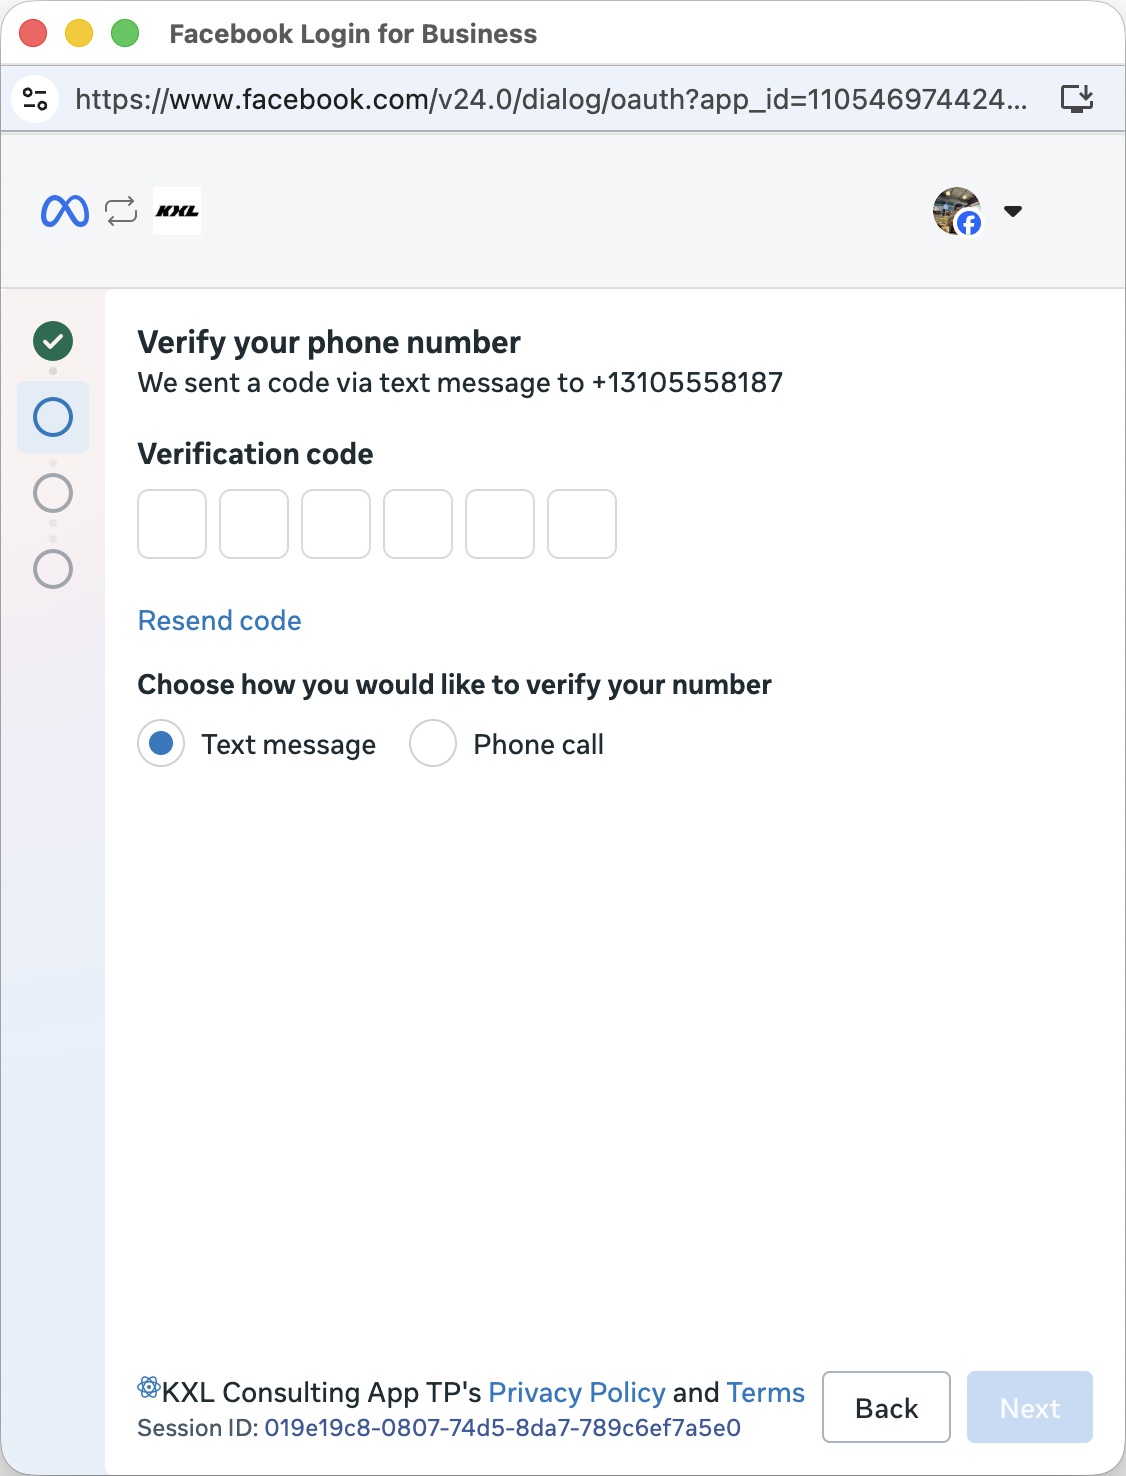
4. Verify the number
Choose SMS or voice call when offered and enter the received code in Meta itself. Ensure the line can receive that method. If an operator or automated attendant handles it, arrange legitimate access to verification. Do not share the code or keep retrying when Meta asks you to wait.
View official Meta screen: Phone verification
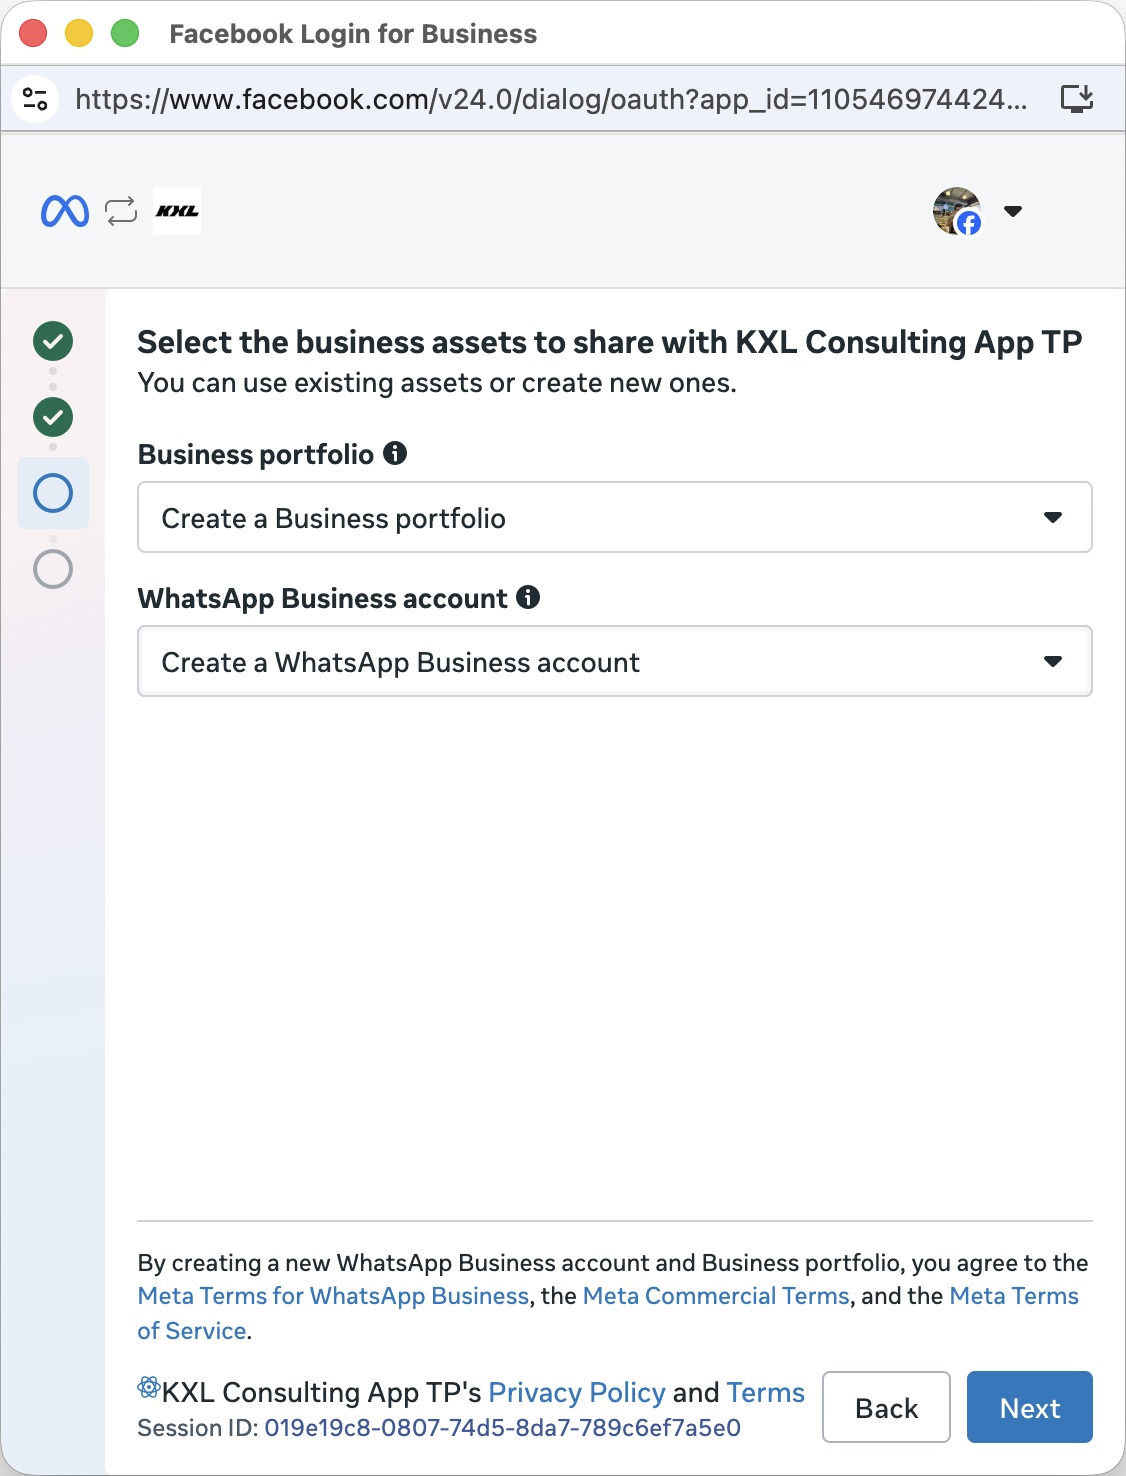
5. Choose the correct business assets
Select the agency’s business portfolio and WhatsApp Business account. Review suitable existing assets before creating others. This determines which resources link to the verified number; a similar account name alone does not prove it is the correct agency.
View official Meta screen: Asset selection
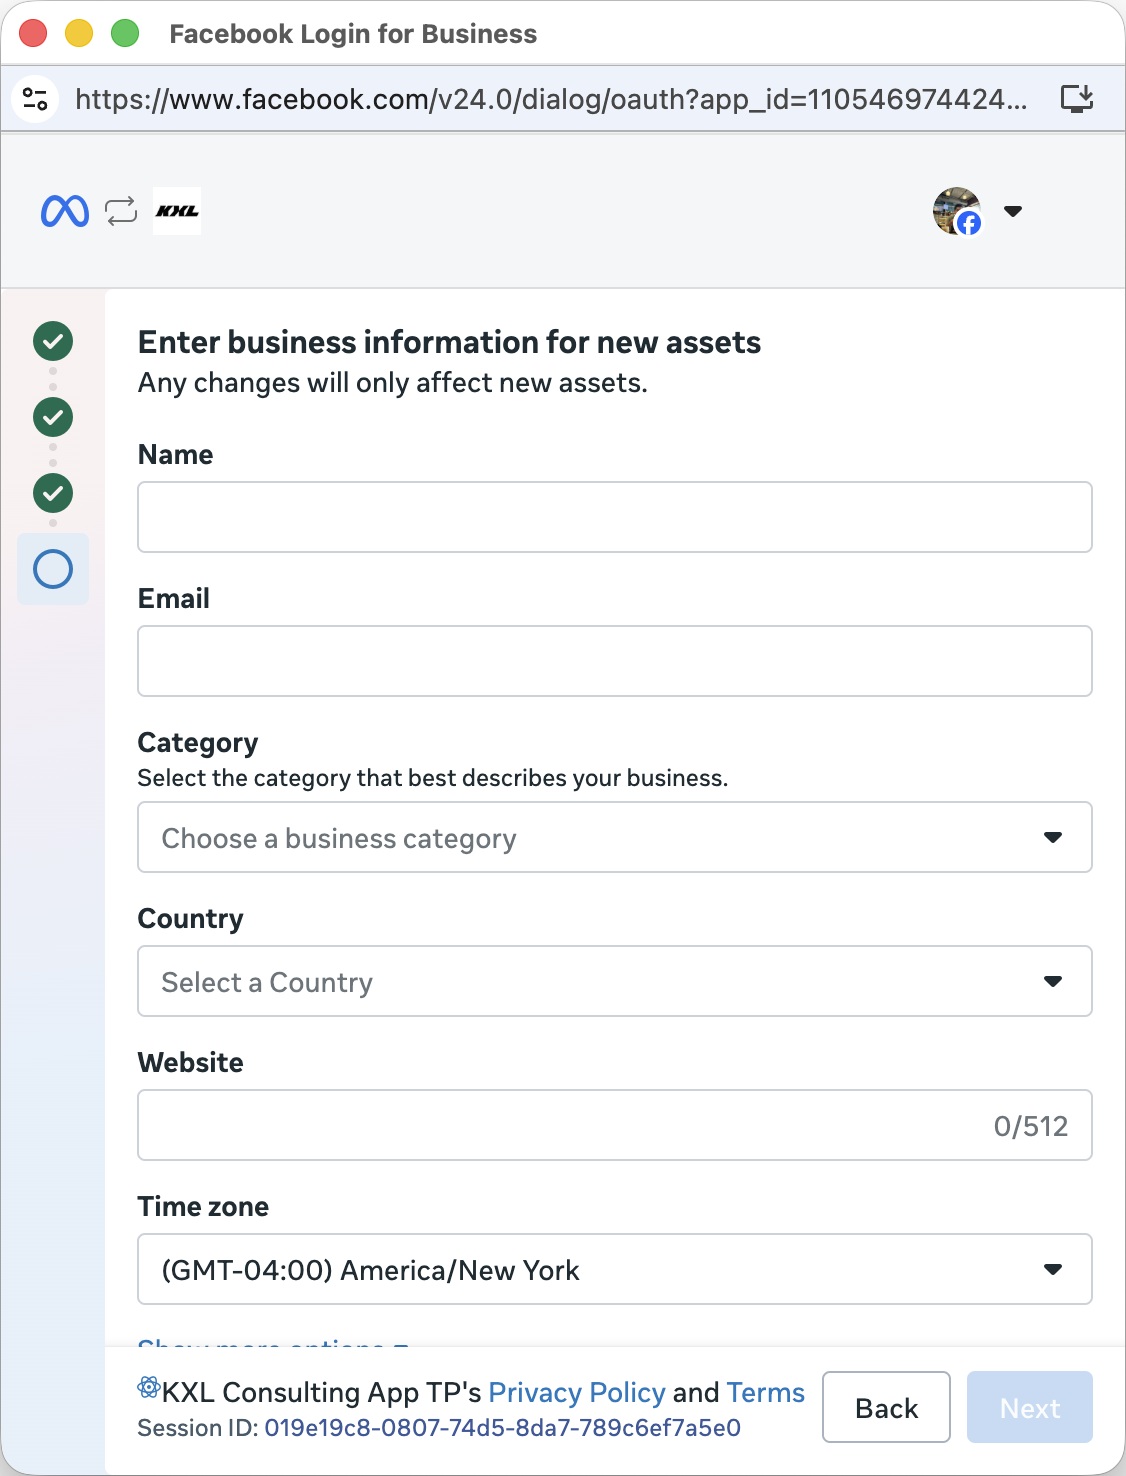
6. Enter business details when needed
When choosing new assets, complete the requested business details, such as name, email, category, country, website and time zone. Use consistent information for the responsible company. This screen is conditional and may not appear with existing assets. Check the time zone before continuing.
View official Meta screen: Business details
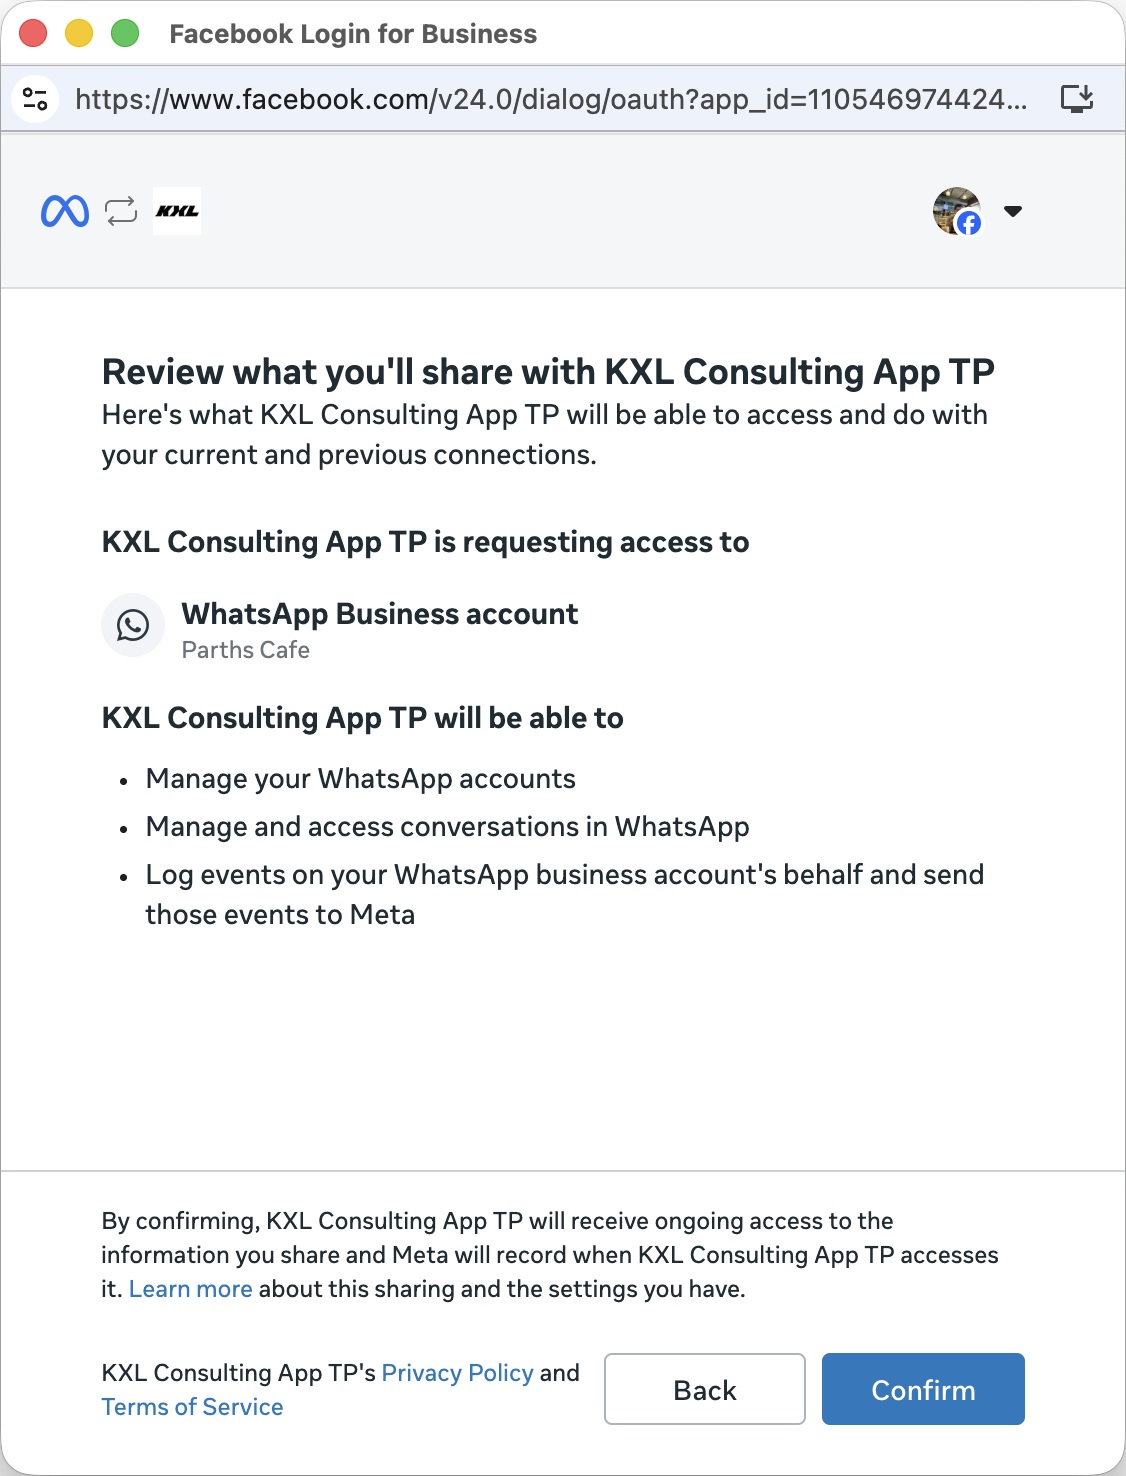
7. Review permissions and conditions
Recheck the business, WhatsApp account and listed permissions. Read the presented conditions and confirm only with authorization to represent the company. Go back if any asset is wrong. Do not accept a configuration merely to try to clear an error.
View official Meta screen: Permissions
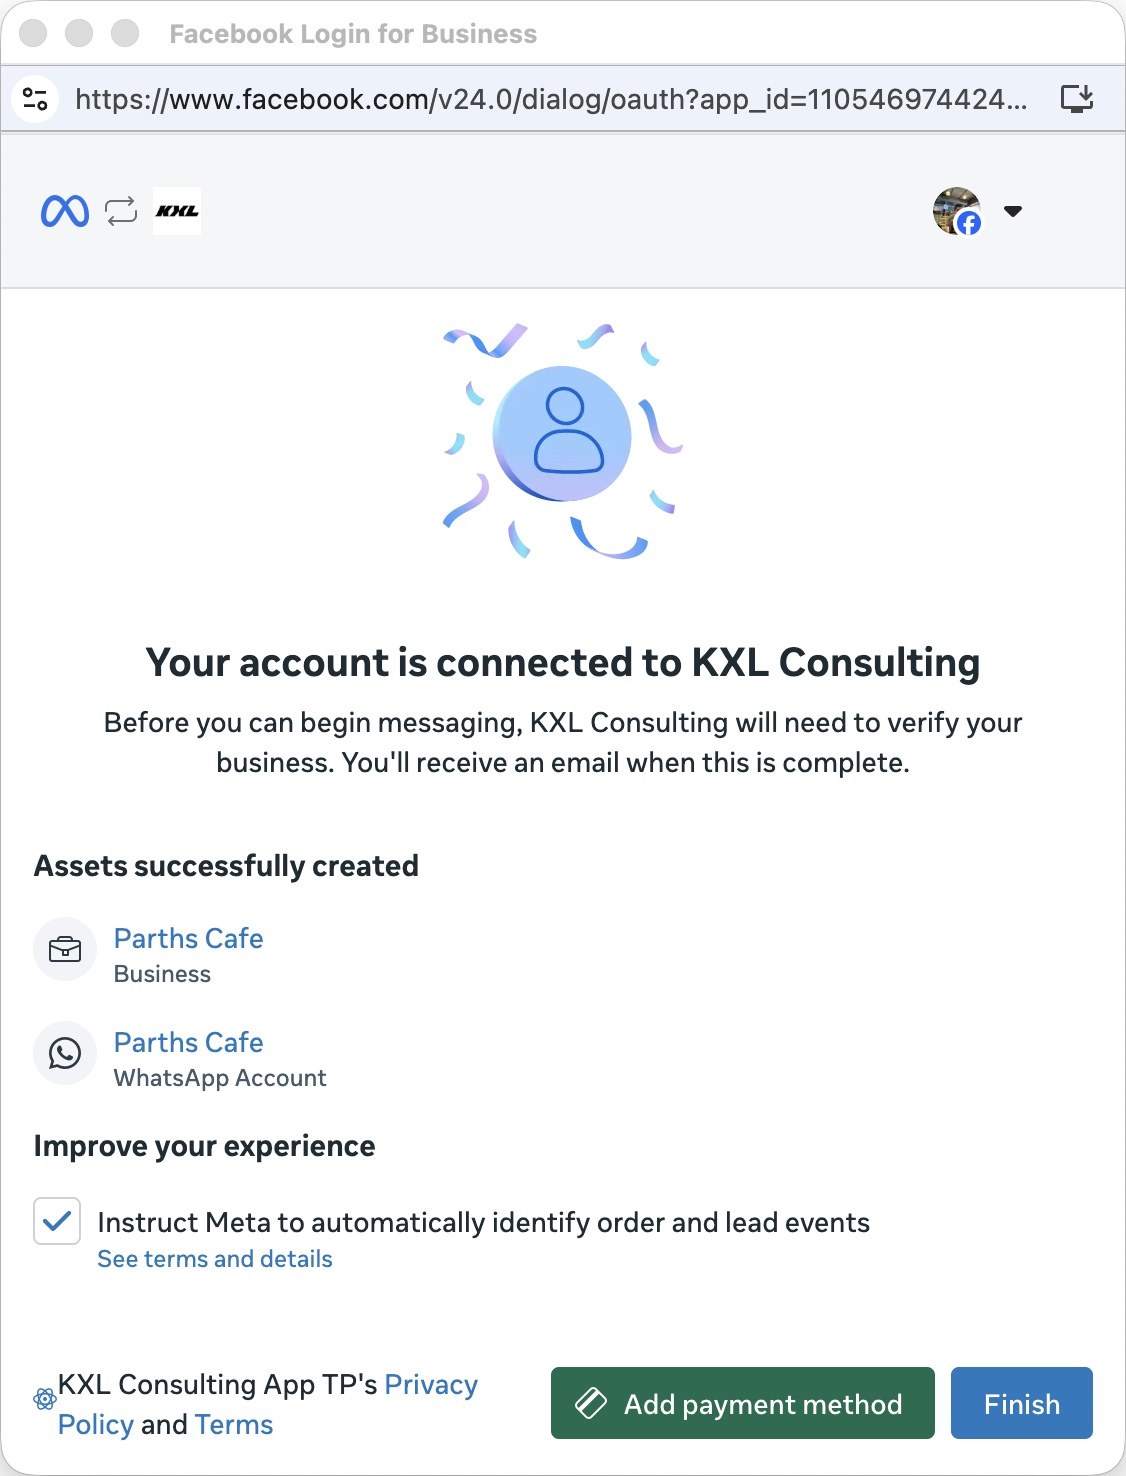
8. Finish and wait for CRMDAY
On success, check the listed assets and finish. Return to CRMDAY and wait for inbox confirmation. Meta’s success screen confirms Meta’s step; CRMDAY must still finish connecting. Follow the next guide to test inbound messages, replies and templates.
View official Meta screen: Success
Related guides
- Understand inboxes and choose your channel
- Connect WhatsApp using a QR code
- Configure bulk-message limits and schedules
- Prepare the official WhatsApp Meta API connection
- Verify Meta API and prepare templates
- Manage team, connection and authentication changes
- Administrator manual
Updated October 25, 2026.