For Insurance agency Owners and administrators.
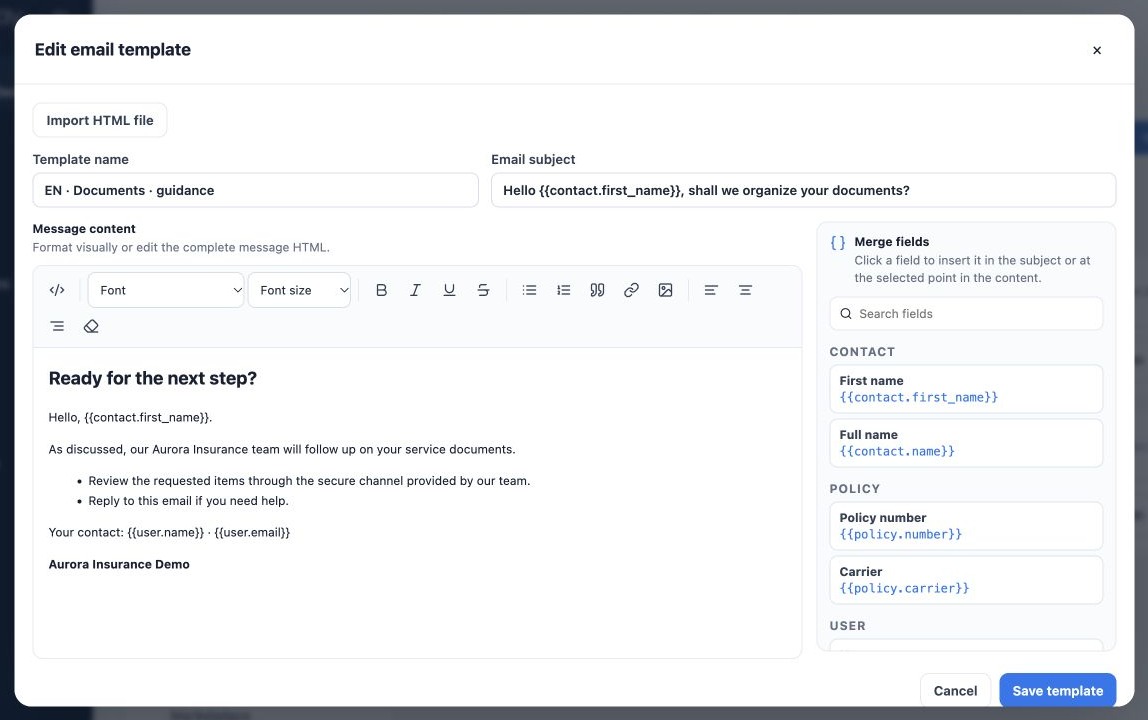
Create or reuse a model
- On Email, click New template or Duplicate an existing row.
- Fill Template name with purpose and language.
- Write a clear Email subject; clients see this in their inbox.
- In Message content, write a greeting, guidance, next action and agency identification.
- Use the editor to format and review links, images, readability and signature. Save and reopen to verify content.
The example guides documents without promising coverage approval. Avoid client-specific facts in fixed text shared by the team. When copying a welcome model, review policy, plan and instructions before reuse.
Insert fields in the correct place
- Click the desired insertion point in subject or body.
- Search Merge fields and click a field. Select the subject first to insert there.
- Use Contact, Policy, User and Form groups according to sending context.
- Keep keys intact: {{contact.first_name}}, {{policy.number}}, {{user.name}}.
Example: Hello {{contact.first_name}}, your policy {{policy.number}}. Values come from the sending record, not the internal template name. Missing data may leave empty text. Also test a contact without a policy to avoid incomplete sentences.
{{form.link}} and {{form.year}} depend on a workflow that supplies form data, such as Open Enrollment sending. Adding a variable to an ordinary email does not create a form or guarantee a link.
Use HTML for an existing layout
The editor supports visual formatting and HTML source. For an existing agency layout, use Import HTML file and select .html or .htm up to 500 KB. Import replaces the current body, asking confirmation when it contains content; it neither publishes nor sends the model.
Review the imported result: email HTML handling may remove incompatible elements. Avoid scripts, interactive forms and resources available only on your computer. Check recipient-accessible images and URLs, then save after reviewing layout.
Check preview and actual sending
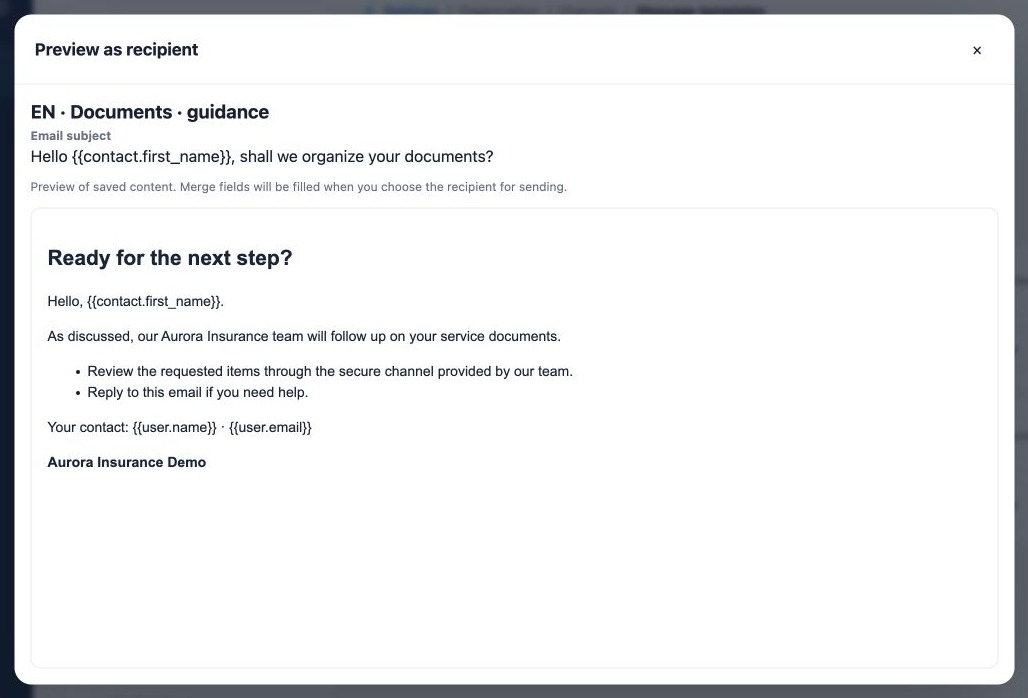
In the list, click Preview as recipient. It displays saved content without editing tools. Merge fields may still appear as variables: this preview does not represent a selected recipient.
To validate personalization, run a controlled send to a fictitious contact with an authorized test address. Check subject, fields, links, images and reply destination. A template neither selects the sender nor enables delivery. See Automation email delivery and Email marketing for setup.
Related guides
- Organize your agency’s message templates
- Create SMS and free-content WhatsApp models
- Prepare and associate official Meta templates
- Maintain versions, test and use templates
- Administrator manual
Reviewed October 26, 2026.