For Insurance agency Owners and administrators.
Guides in this chapter
Open the agency catalog
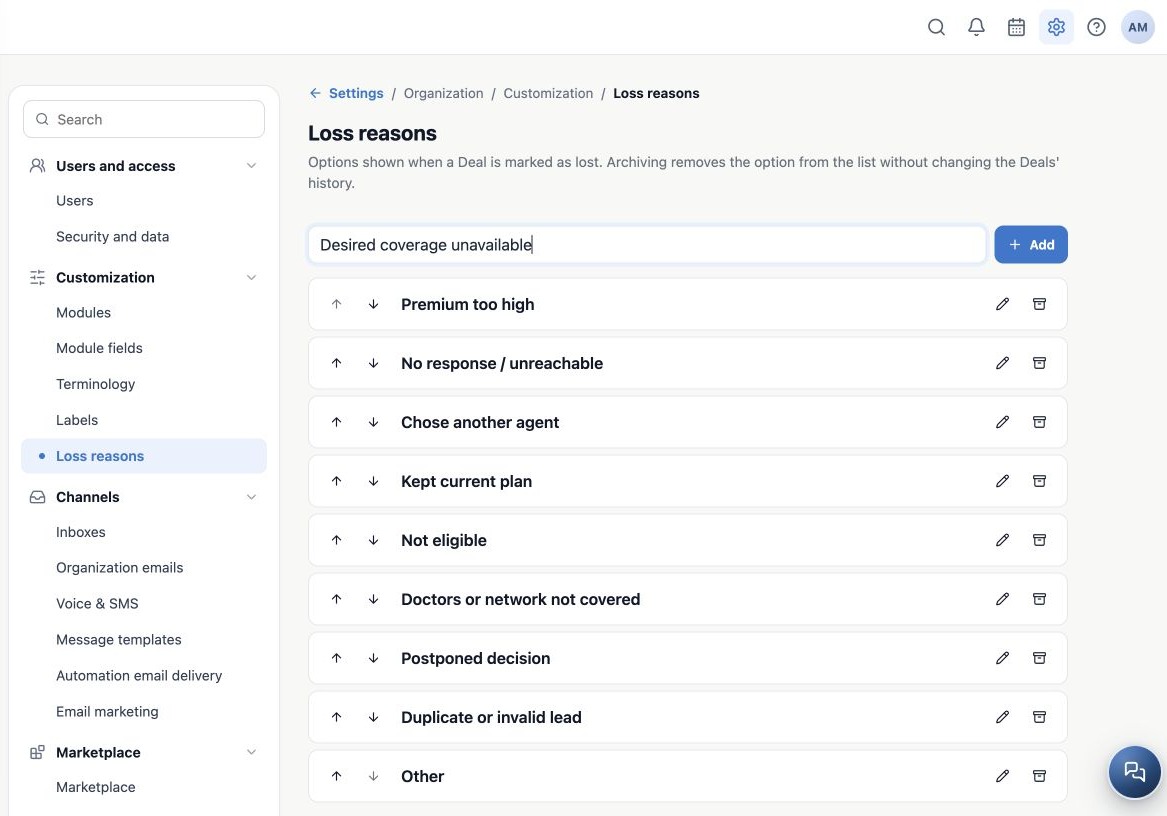
As an Owner or administrator, open Administration → Settings → Customization → Loss reasons. Deals must be available in your access. This shared agency catalog supplies the options when marking a Deal as lost; it is not a catalog exclusive to one pipeline.
A loss reason explains why that opportunity did not close. It is not a policy status, does not cancel client coverage and does not delete the contact. A client can keep an active policy while losing an opportunity for a different product.
Use the Insurance options
An agency can start with standard Insurance reasons. Check the current catalog before adding another, because the team may already have customized it.
| Standard reason | Operational interpretation |
|---|---|
| Premium too high | The quoted cost was the main recorded objection. |
| No response / unreachable | The agency’s defined contact-attempt process ended without a reply. |
| Chose another agent / Kept current plan | The client communicated their decision. |
| Not eligible / Doctors or network not covered | Qualification or comparison identified a limitation; record context in a note, without sensitive data in the name. |
| Postponed decision | The current opportunity closed; a future follow-up can be planned separately. |
| Duplicate or invalid lead / Other | Follow the internal rule; Other requires context in a note. |
These are operational classifications. Selecting Not eligible does not perform an eligibility assessment or replace appropriate case verification.
Add a useful, specific option
- Confirm that no existing reason represents the same situation.
- Enter a clear name of up to 120 characters in New loss reason, such as Desired coverage unavailable.
- Click Add.
- Locate the new item. It is added at the end of the current order.
- Reopen settings and verify it. Then check the option in a test Deal’s loss selector.
Choose one main cause per opportunity. Avoid reasons such as “Lost,” which repeat the status, or client names and personal details. Matching names regardless of capitalization may reuse an existing option; adding an archived name can reactivate it. Inspect before adding.
Related guides
- Order, rename and archive reasons safely
- Record a Deal loss and review the results
- Terminology
- Labels
- Administrator manual
Updated October 25, 2026.