For: CRMDAY One users with the Insurance profile.
Select cards for sending
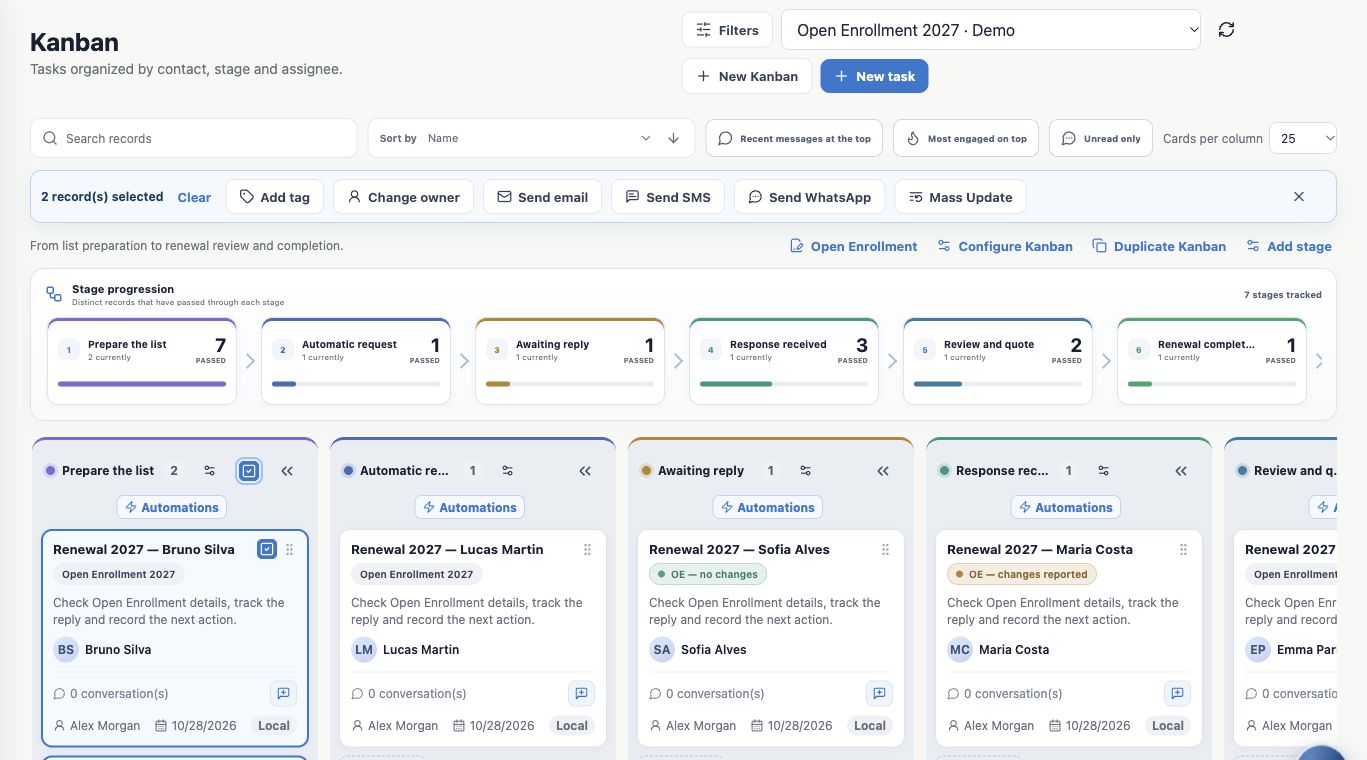
- Open the Open Enrollment Kanban and locate cards in Prepare the list.
- Check contacts and select cards individually or with the column selector. Review the selected count.
- Choose Send email, Send SMS or Send WhatsApp in the action bar. Images show WhatsApp.
- Check audience and inbox or sender. The linked contact receives the message; several selected cards for one person do not require duplicate messages.
Form association and card actions belong to this Kanban flow. Sending a generic bulk message from Contacts is a different procedure.
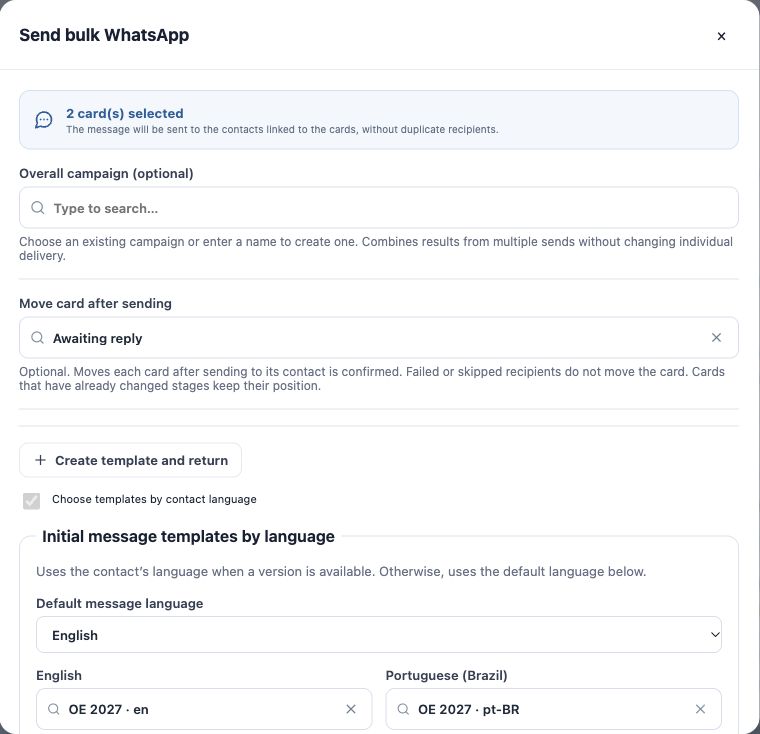
Set the destination after sending
For Move card after sending, choose Awaiting reply, or leave movement unset if that is the agency’s plan. This example has no active invitation automation in that stage.
Movement occurs when the outbound service confirms acceptance for that recipient. Creating or queueing a campaign alone does not move cards, and acceptance does not prove reading or signature. Failed and skipped recipients do not move cards. A card already moved manually keeps its position.
Do not choose a destination that sends another invitation to the same group. If your agency uses automation exclusively, check existing requests before creating an additional campaign.
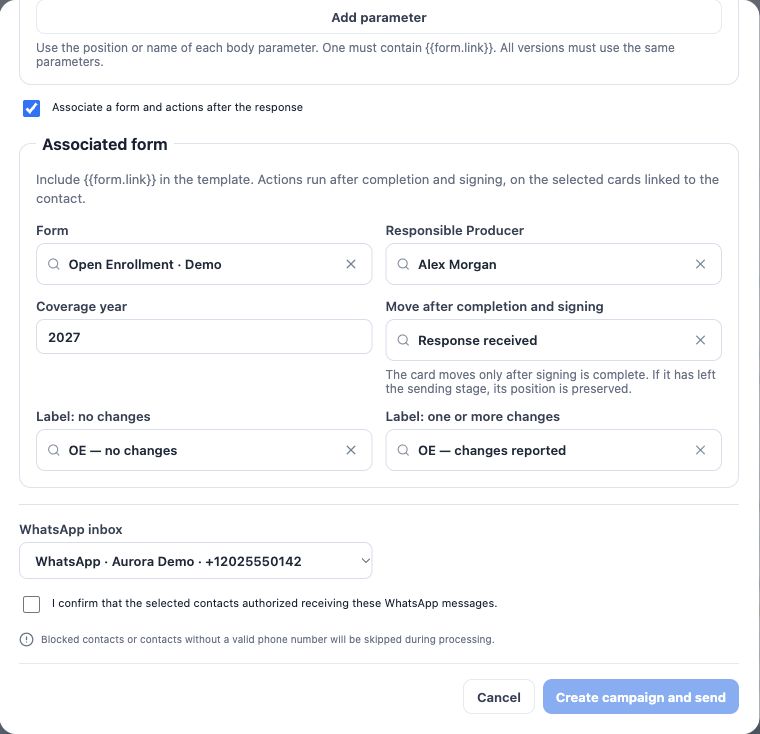
Associate the form and return after response
- Check Associate a form and actions after the response.
- Choose the Open Enrollment Form and Responsible Producer.
- Check Coverage year.
- For Move after completion and signing, select Response received in the same Kanban and different from the source stage.
- Optionally configure Label: no changes and Label: one or more changes using existing agency labels.
“No changes” requires explicit no-change answers to every applicable change question; any reported change qualifies as one or more changes. Missing or unknown answers are not confirmation that nothing changed. These labels describe form answers, not approval of a plan.
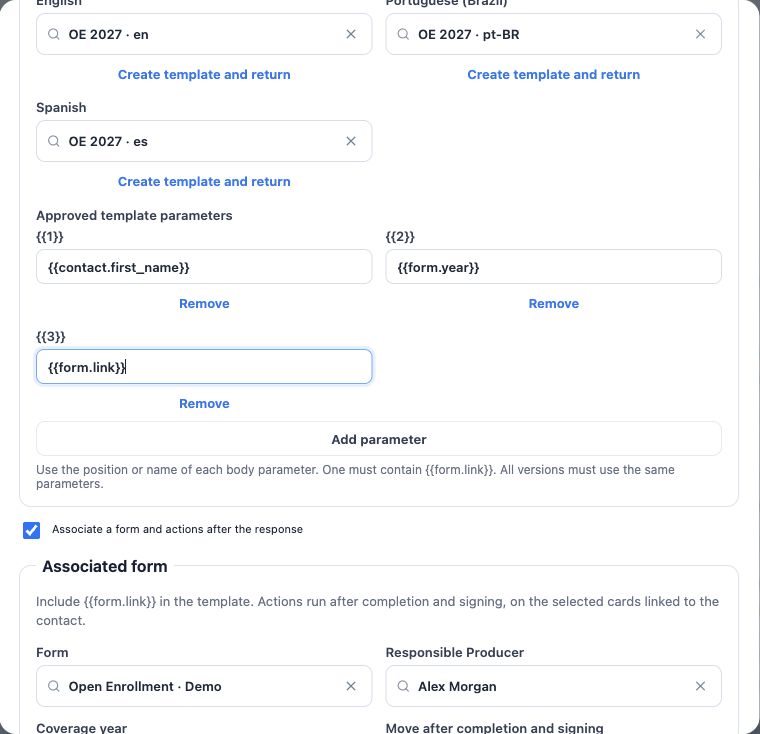
Use the right language versions and individual link
- Check the option to choose templates by contact language and the default language. Associating a form enables these settings.
- Choose English, Portuguese and Spanish templates for the operation. The default-language version is required.
- Include {{form.link}} and use {{form.year}} for the year. Official WhatsApp requires compatible approved inbox templates and body parameters.
- If content is missing, use Create template and return when authorized; saving a template does not send the campaign.
- Review versions and parameters using the automation guide as a reference, without copying parameter positions that do not match the real template.
Review and confirm sending deliberately
- Check recipients, channel, form, Producer, year, default language and available versions.
- Check both destinations: Awaiting reply after sending and Response received after signature. These are different events.
- For WhatsApp and SMS, review the required receipt-authorization confirmation and check it only when true. Respect blocks and channels allowed by the agency.
- Click Create campaign and send only when ready for real sending. This requests group processing.
- Follow the delivery hub. Resolve failed and skipped items before retrying; check completed sending to avoid repetition.
Each contact receives an individual request associated with their selected cards. You do not need to create one link manually and paste it for everyone. Manual images show local preparation; no invitations were sent to real clients.
Track return in the board
After sending is confirmed, cards can be in Awaiting reply. When the client completes and signs the latest request, configured return and labels are applied while respecting manual movements and valid relationships. Card position does not replace checking the submission.
A thank-you in a conversation or opening the link does not equal completed signature. Continue with Track responses, review details and complete renewal.
Keep learning
- Understand Open Enrollment and prepare the Kanban
- Start Open Enrollment from your policy portfolio
- Select contacts and create cards in the renewal Kanban
- Automate invitations and card return after signature
- Track responses, review details and complete renewal
- Request documents and signatures
- Serve your clients
Updated October 24, 2026.