Who this is for: Each user connects their own mailbox
Connect the mailbox you use for work to send and follow client-related emails inside the CRM. This connection is separate from the email you use to sign in.
Step by step
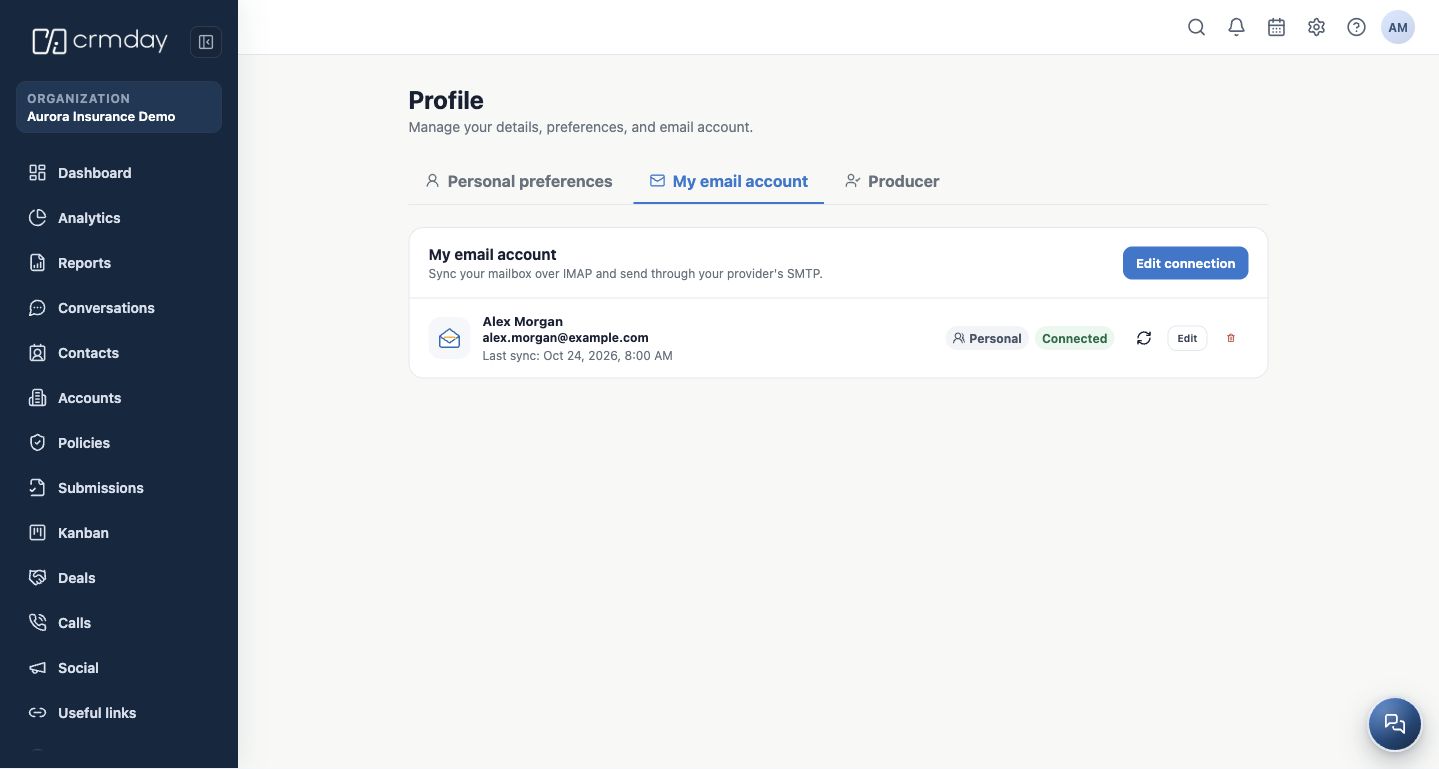
- Open User menu → Edit profile → My email account. For the first connection, click Connect my account. After connection, the option becomes Edit connection.
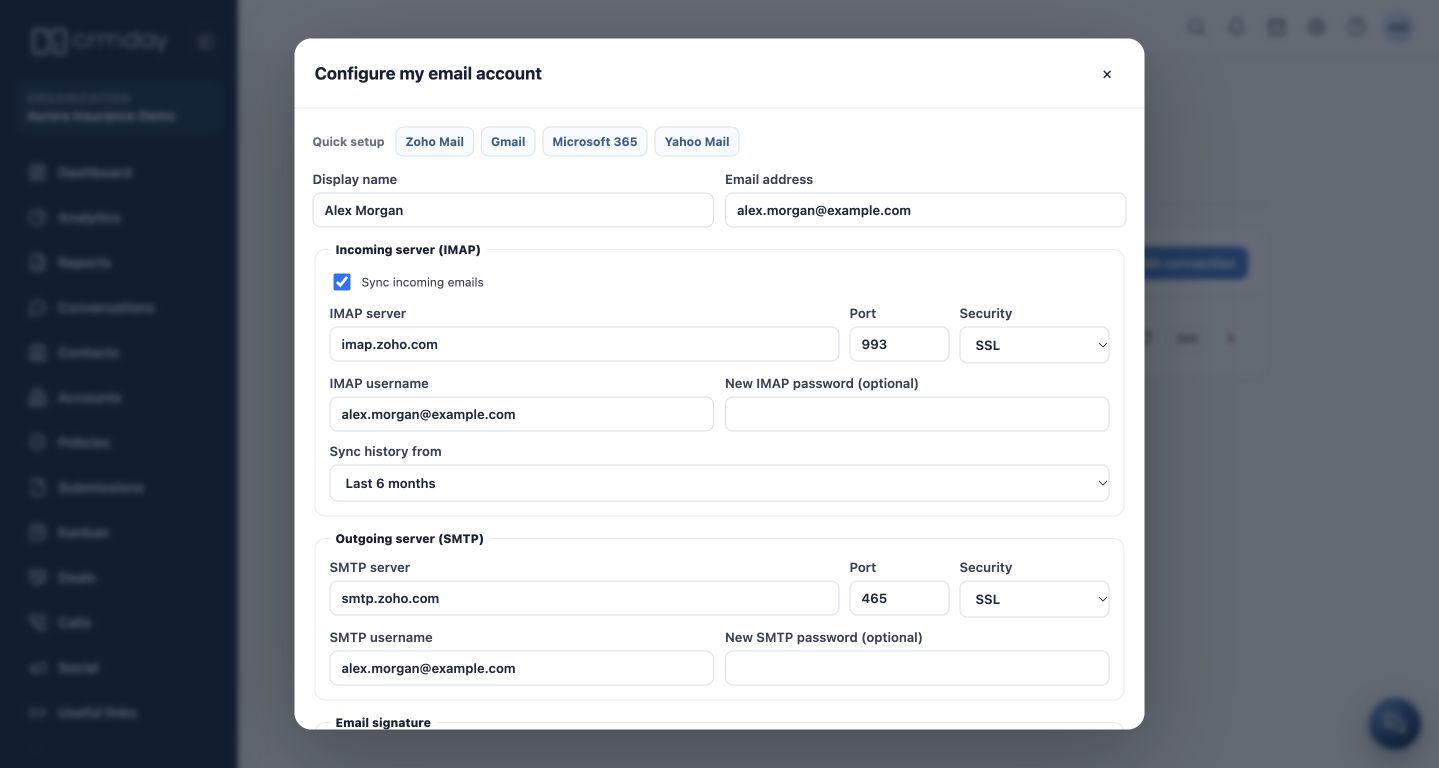
- Choose the provider. Gmail and Microsoft 365 may offer the provider’s own sign-in when that connection is enabled. Zoho Mail and Other email use the incoming and outgoing settings shown by the system.
- For manual setup, check display name, email address, incoming IMAP server and outgoing SMTP server, including the ports, security and username supplied by your provider.
- Enter the credential required by your provider. Some services require an app password or administrator approval. Do not use the demonstration examples as real credentials.
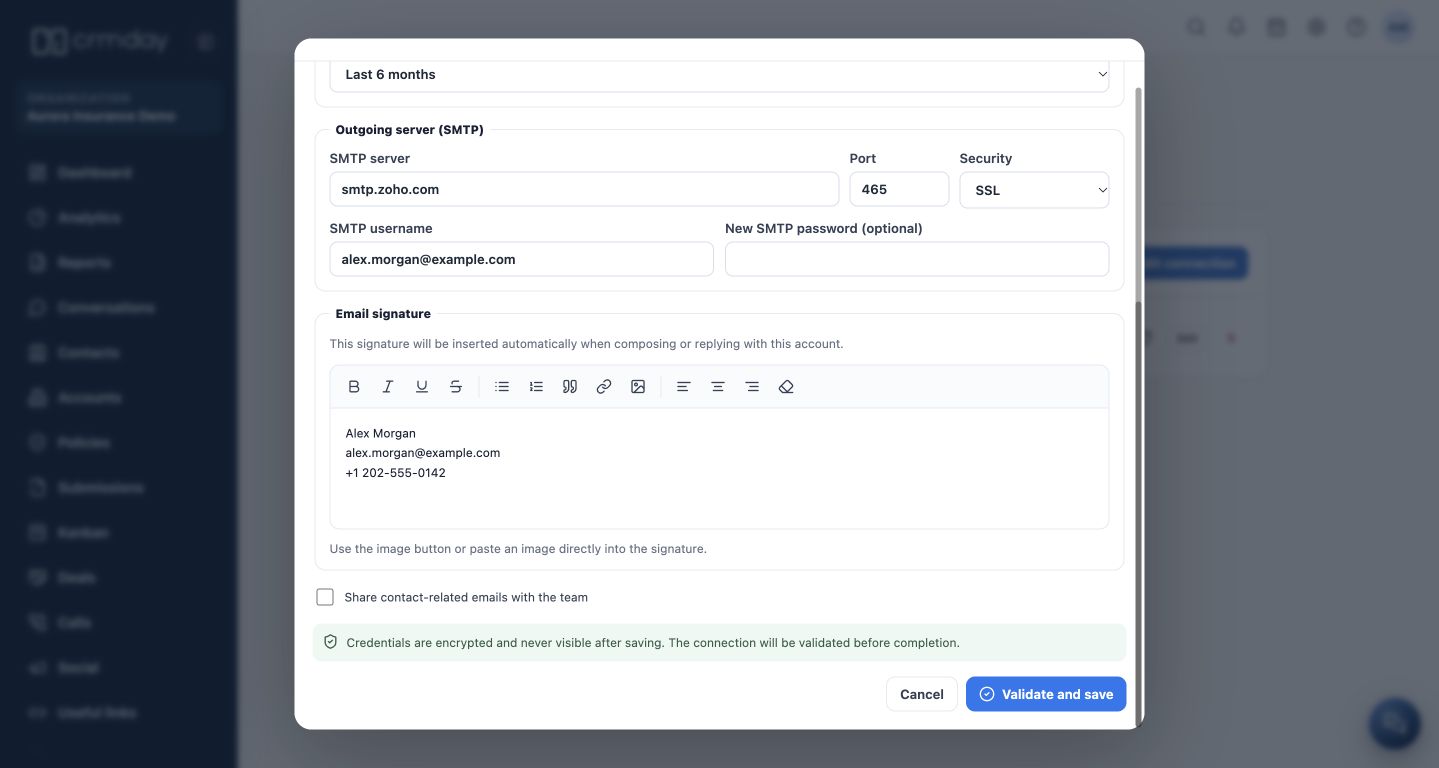
- Choose the history window, prepare your Email signature and review whether contact-related emails should be shared with the team.
- Complete provider authorization or click Validate and save, depending on the flow. Check the account card, connection status and last synchronization.
Check before sending
In the demonstration, Alex uses alex.morgan@example.com with IMAP for incoming messages and SMTP for outgoing messages. The server values illustrate the screen; use the valid settings for your own mailbox.
The signature is inserted when composing or replying with this account. Initial history synchronization can take time. If a connection fails, review the message shown. Canceling provider authorization does not complete the connection.
To verify sending, use a test recipient approved by the agency. Do not send a test message to a real client.
How to check you are ready
Your mailbox is connected with the correct address, a reviewed signature and an intentional sharing setting.