For Insurance agency Owners and administrators.
Open the action in the correct stage
- Open Kanban or Deals and select the intended board and stage.
- Click the stage’s Automations and add an action or edit an existing one.
- Choose When to run and Send email. For the document example, use entry into Waiting for client.
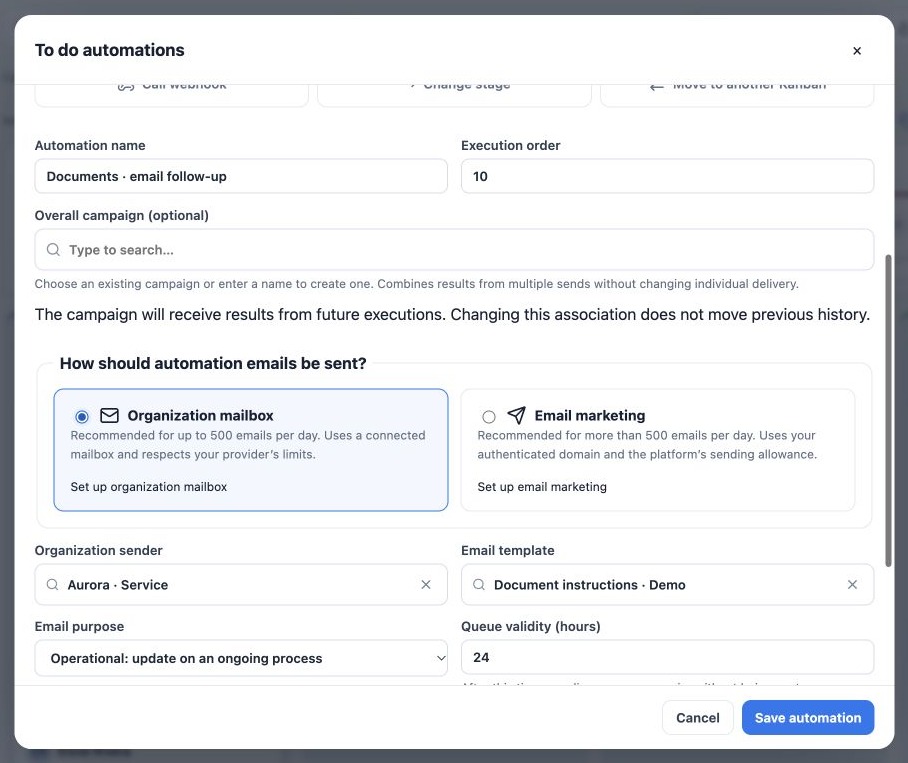
- Use a clear name such as Documents · email follow-up and review execution order.
- Optionally associate an Overall campaign to combine future execution results; it changes neither delivery method nor previous history.
The images use a demonstration To do stage. In your operation, choose the stage that represents the right moment. Keep the action paused while preparing its fields.
Choose method and sender
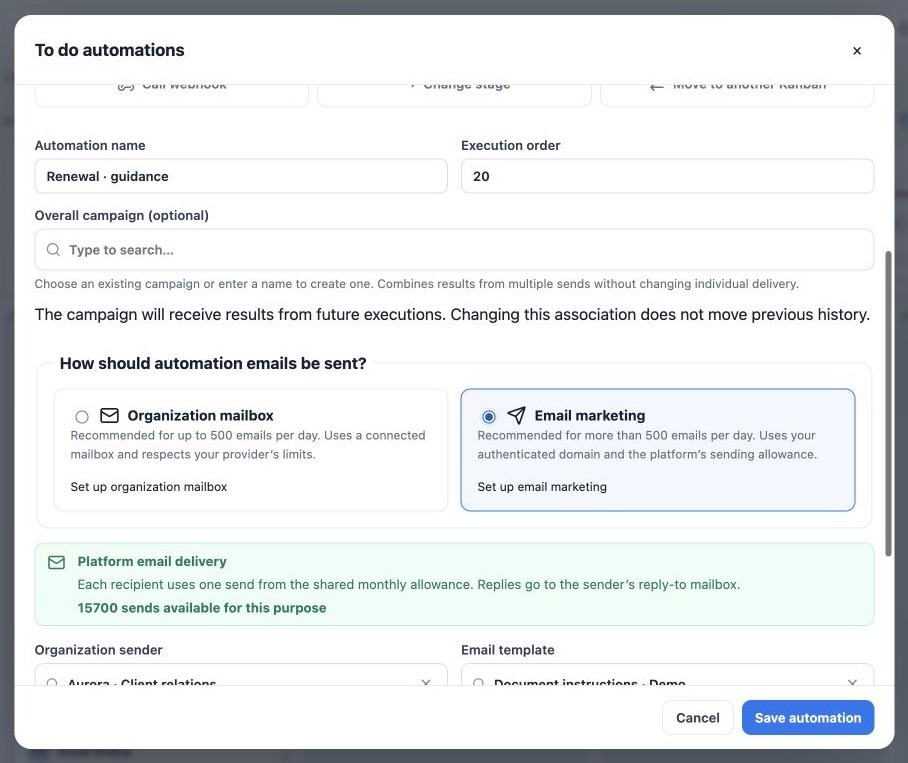
- Under How should automation emails be sent?, select Organization mailbox or Email marketing.
- In Organization sender, select the correct identity and check its address. Mailbox delivery lists eligible connected organization accounts.
- For email marketing, check allowance information and authentication of the address’s exact domain. A pending subdomain is not ready merely because another domain is authenticated.
- Choose the Email template and review content and language. Changing the interface language alone does not translate the template.
After changing methods, select the sender again. The form clears it to prevent an incompatible identity. If missing, check account type, connection and access; do not switch to another agency to bypass the problem.
Set purpose and expiry
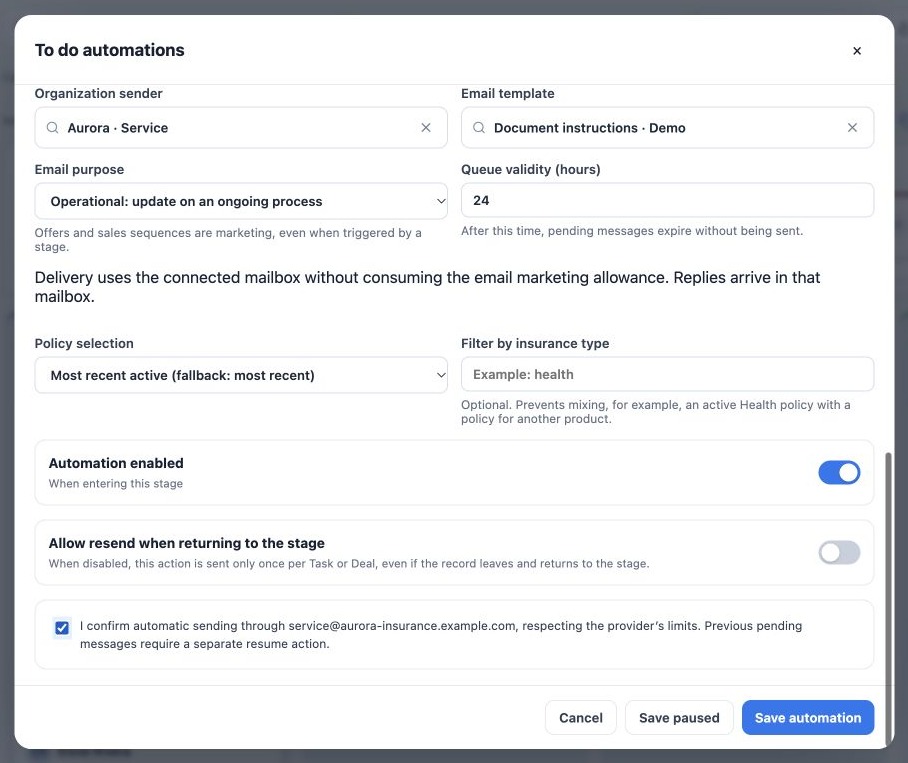
Select Marketing and sales outreach for offers and commercial sequences. Use Operational: update on an ongoing process for a concrete update, such as guidance about documents already requested. A stage trigger alone does not determine purpose.
For email marketing, purpose affects available balance: campaigns use campaign balance; operational messages use the applicable shared balance. A connected mailbox does not consume marketing allowance, but provider restrictions and recipient blocks still apply.
Queue validity accepts 1–72 hours, defaulting to 24. This is the maximum time a pending message remains eligible, not a schedule. Expired messages are discarded without sending. Also review Policy selection if the template depends on policy data.
Confirm and save with control
- Review the template and all parameters before activation.
- Check Allow resend when returning to the stage. Disabled, it sends once per Task or Deal; enabled, returning may trigger another send.
- Enable Automation enabled only when ready.
- Read and check confirmation for the method and sender. Delivery parameter changes may require fresh confirmation.
- Click Save automation, then reopen and verify the saved configuration. Use Save paused if preparation remains incomplete.
For Open Enrollment email actions, apply the same method and sender review, alongside form, year, Producer data and journey template. Saving a rule is not a command to resend all earlier pending messages.
Related guides
Reviewed October 26, 2026.