For Insurance agency Owners and administrators.
Before you start: SMS has its own activation
Use SMS for agency service confirmations and reminders with the recipient’s authorization. Open Administration → Settings → Channels → Inboxes → New inbox → SMS. When included, the card opens Voice & SMS → SMS. If a subscription is requested, have the account owner check availability; creating a generic inbox does not enable the service.
Voice can be active while SMS is still unavailable. Check organization registration and an SMS-capable number in Voice & SMS. If the service is unconfigured, under testing or unavailable to your access, ask the CRMDAY team about enablement. If your agency uses another phone integration, follow that integration’s setup; do not switch providers merely to create an inbox.
Prepare Brand and Campaign registration
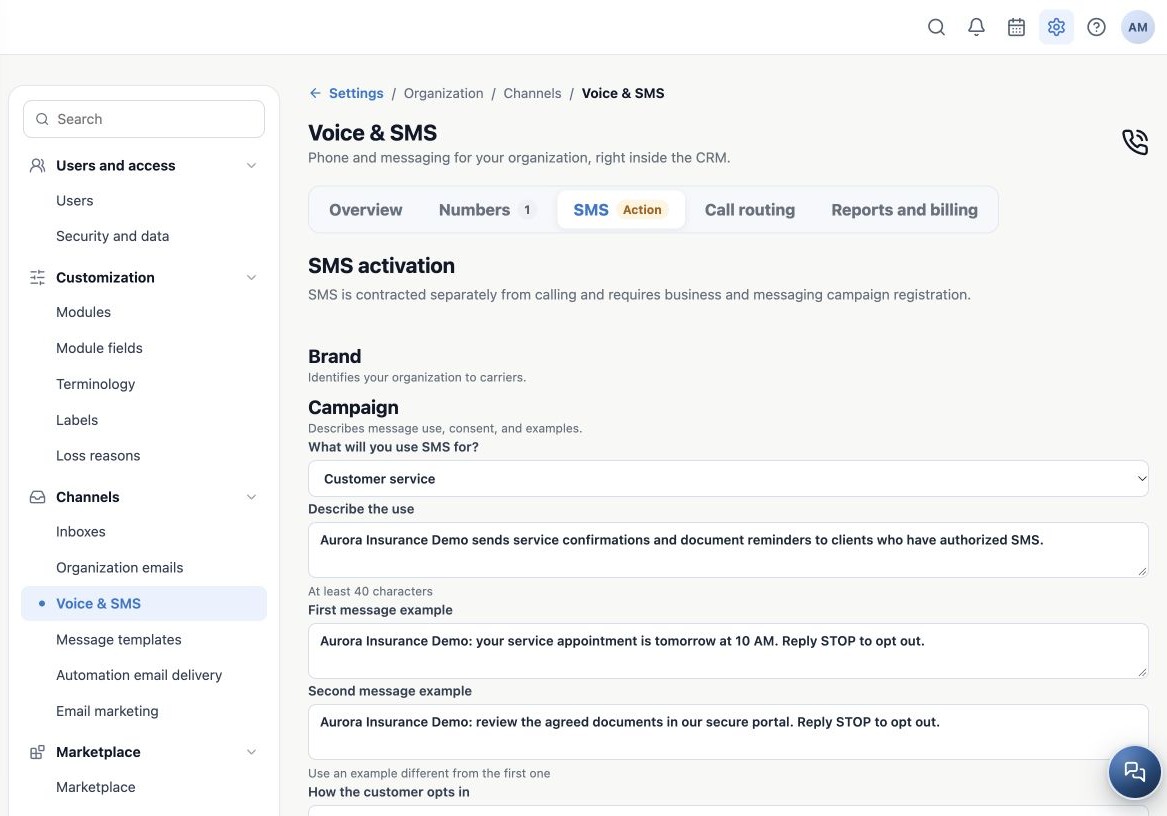
- With voice prepared, open SMS and click Start SMS registration.
- Check the organization details. Brand identifies the business; Campaign describes the messaging purpose. It is different from a CRM recipient campaign.
- Select the actual use: customer care, reminders, account notifications, verification or mixed. Describe the routine clearly in at least 40 characters.
- Write two distinct message examples of at least 20 characters each, identifying the agency and how recipients can stop messages.
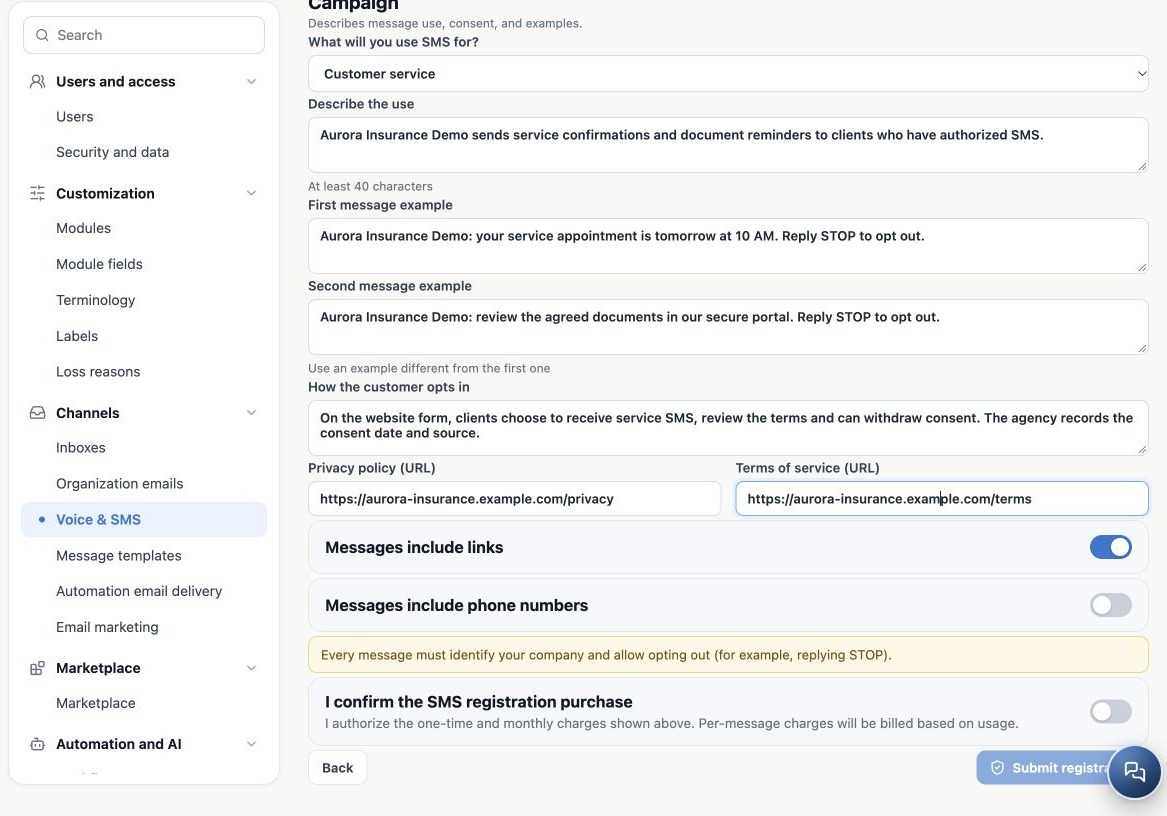
- Explain how the client authorizes messages in at least 40 characters. Enter real HTTPS privacy-policy and terms URLs; indicate whether messages include links or phone numbers.
The image uses fictitious data. Your business details, pages and authorization process must be real and consistent with the declared use. Do not copy the example.com domain or describe a consent process your agency does not use.
Review costs and track approval
Review the amounts displayed in your account before confirming the subscription and clicking Submit registration. Registration, review, monthly and per-segment usage costs can apply; this manual does not fix prices. Sole proprietors may see no-EIN confirmation and mobile-verification authorization. When requested, reply YES to the verification SMS within the displayed deadline.
After submission, follow the stages and use Check now when available. Campaign waits for Brand approval and can be created automatically afterward; do not submit another registration to speed it up. If corrections are requested, edit registration or correct Campaign, review highlighted fields and request review again. Submitted registration or approved voice does not mean approved SMS.
Create the approved number’s inbox
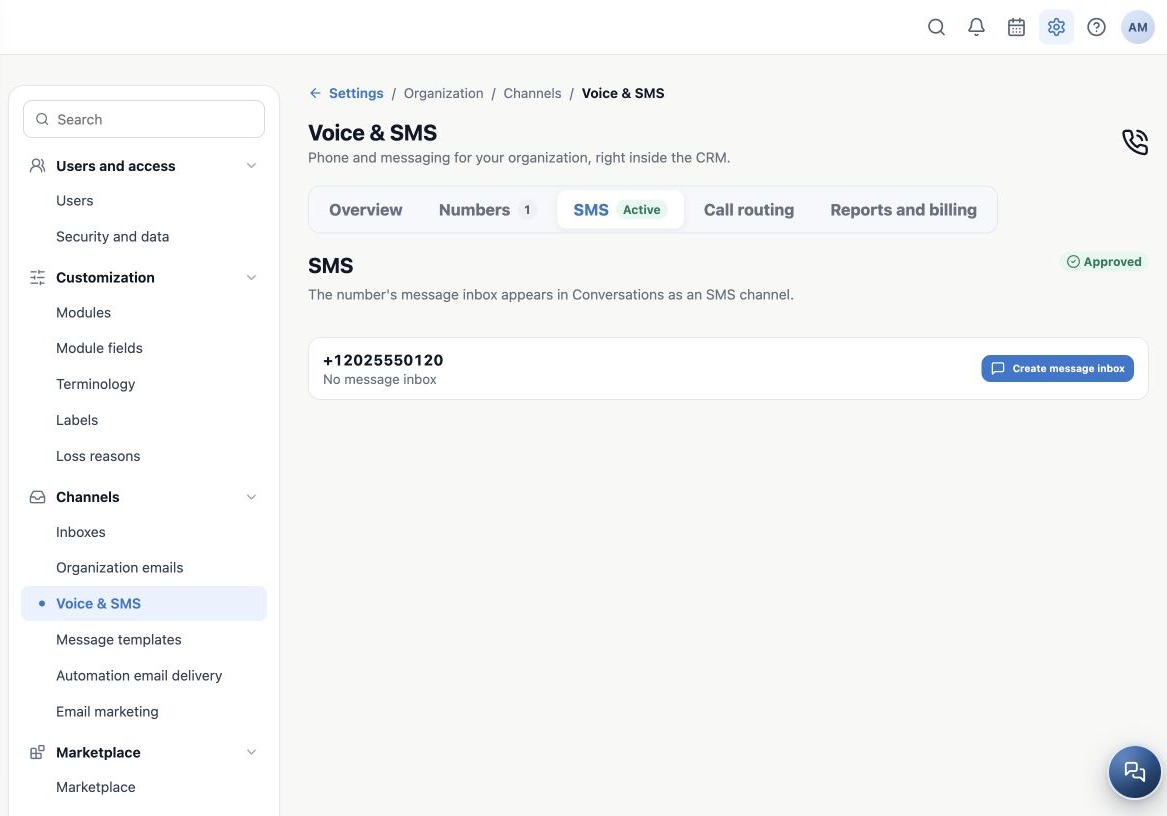
- Once SMS is approved, open the SMS tab.
- Find the correct number. If it says No message inbox, click Create message inbox.
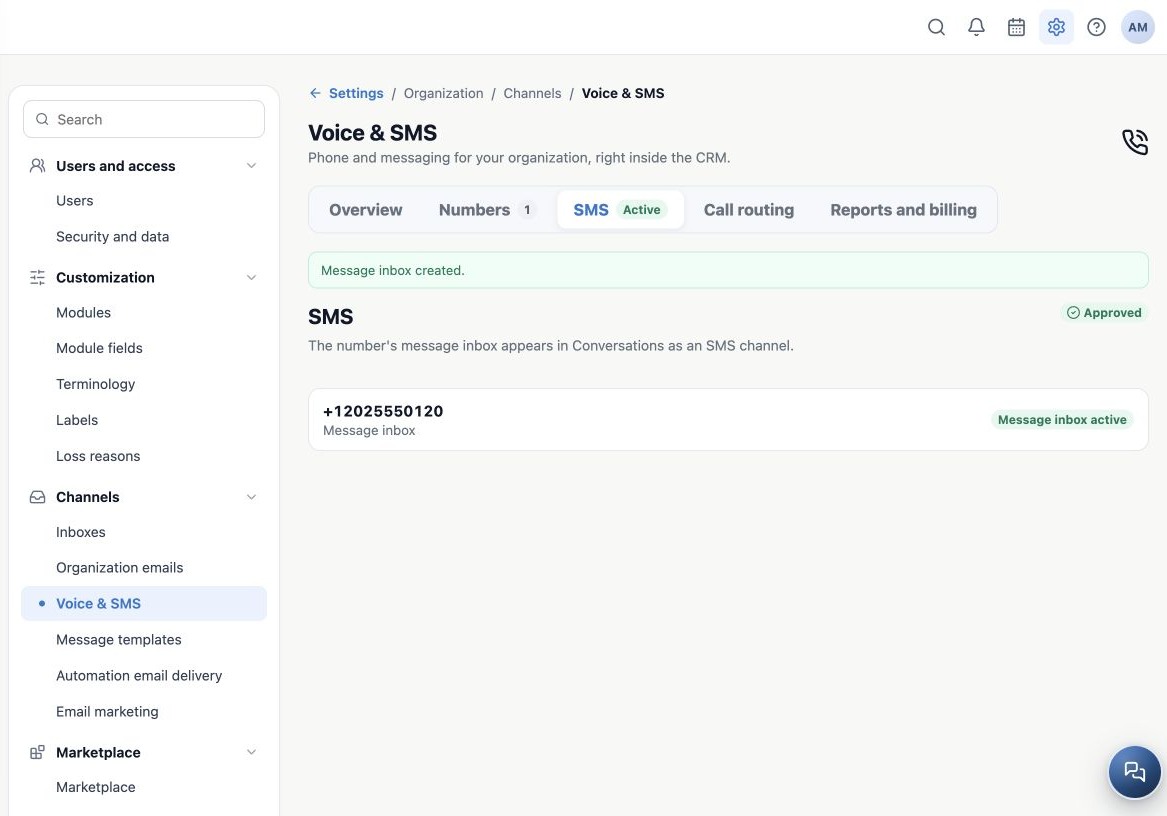
- Check Message inbox active for that number. Use an existing inbox if already created.
- Return to Channels → Inboxes, find the SMS number and configure Team.
- Review Sending rules before automations or bulk sends; guide 07.03 explains caps, schedules and intervals.
A phone-managed inbox has its own number binding. Do not replace it with a manual API inbox or change its classification. Use as SMS on an API is a classification for prepared integrations; it does not purchase a number or approve SMS.
Test before using with clients
- Send an SMS from another authorized phone to the agency number.
- In Conversations, filter by the SMS inbox, open it and check the sender.
- Reply with a simple test and confirm arrival on the phone.
- Test with an authorized team agent and check number, recipient and channel before daily use.
If it fails, check approval, number SMS capability, active inbox, access, credits and the displayed status. Acceptance is not proof of delivery. Test attachments only when supported by the channel and integration; WhatsApp features do not automatically work over SMS. Record inbox, time and error for support. Do not duplicate a send while its outcome is uncertain.
Related guides
- Understand inboxes and choose your channel
- Connect WhatsApp using a QR code
- Configure bulk-message limits and schedules
- Prepare the official WhatsApp Meta API connection
- Complete Meta signup: an illustrated walkthrough
- Verify Meta API and prepare templates
- Manage team, connection and authentication changes
- Connect Instagram for messaging support
- Add website chat with WebWidget
- Create an API inbox for an integration
- Administrator manual
Updated October 25, 2026.