For Insurance agency Owners and administrators.
Create an identity clients recognize
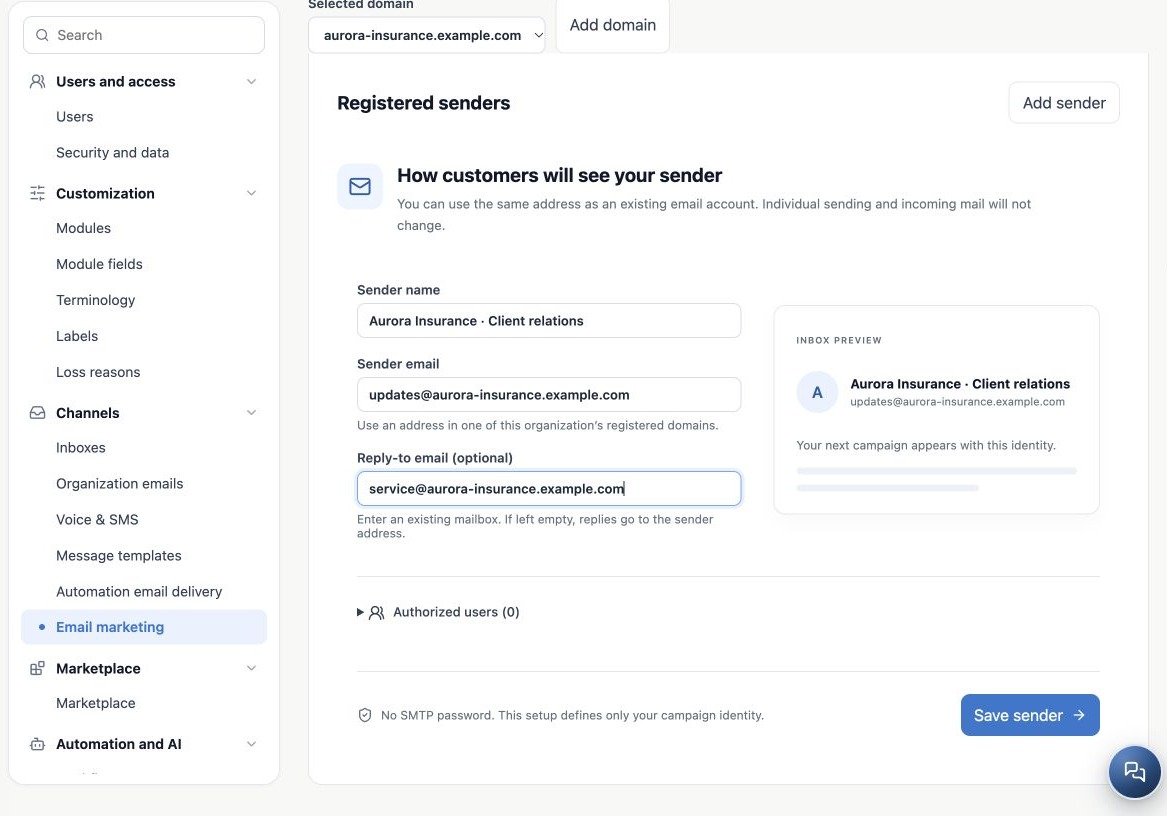
- Open Email marketing → Sender. Register a domain first if none exists.
- Click Add sender for a new identity, or select an existing card to edit.
- Enter a recognizable Sender name, such as Aurora Insurance · Client relations.
- Use an exact Sender email address from a domain registered to the organization.
- In the optional reply-to field, enter an existing mailbox monitored by your team. If empty, replies go to the sender address.
- Check the inbox preview, then select authorized users.
This setup needs no SMTP password, creates no mailbox and does not enable receiving. Reusing an existing account address does not replace its credentials. Before a campaign, verify that the reply destination really receives mail and is monitored.
Choose who may use the sender
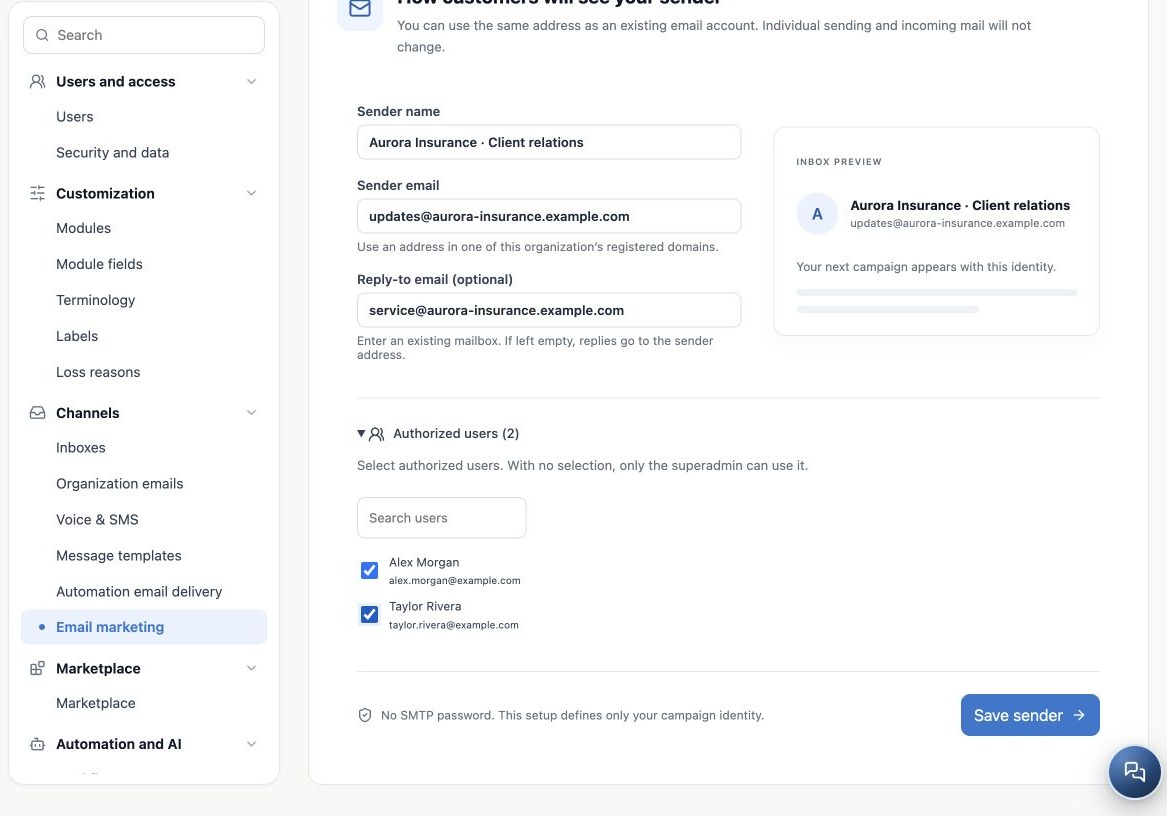
- Expand Authorized users.
- Search for members by name or email.
- Select those who should use this identity. Alex Morgan and Taylor Rivera in the example are fictitious.
- Click Save sender.
- Reopen the card and verify address, reply-to and authorized users.
With no users selected, only the Superadmin can use it. Empty selection does not mean organization-wide access. Administrator configuration access does not replace checking sender-use authorization. Review when roles or team membership change.
Organize multiple identities without duplicating mailboxes
You can create client-relations and renewal senders, each with its own display name, reply-to and authorized users. They share the organization allowance. More senders add no capacity and do not alter existing receiving accounts.
Select the correct card before editing. Do not duplicate an active dedicated address in another identity within the organization. Renaming does not change the authenticated domain. For an address on another domain, register and authenticate it before delivery. Team names remain as entered; changing interface language does not translate sender identity.
If the sender is missing when sending
| Check | What to verify |
|---|---|
| Sending method | Is Email marketing selected? A mailbox sender list may differ. |
| User | Authorized for that identity and correct agency? |
| Domain | Exact address domain registered and authenticated? |
| Availability | Enabled service, active account, allowance, pause and blocks. |
| Registration | Saved to the correct card? |
Test with an authorized user. Check the received display name and address, then reply to validate Reply-To. A dedicated campaign sender is not an SMTP account for individual mail.
Related guides
- Prepare your agency’s email marketing
- Register and organize sending domains
- Authenticate the domain with DNS records
- Configure the campaign footer and unsubscribe link
- Validate setup and monitor sending
- Administrator manual
Updated October 25, 2026.